Some of the kids that went on the trip pose in front of a vehicle in their lobby. Photography is not allowed in the facility for group tours.
Earlier this month we arranged for a Subaru Indiana Automotive (SIA) plant group tour in Lafayette, Indiana. The 2.3 million sq. ft. plant was officially opened in 1989, but has undergone some remarkable expansion the last few years to a facility that has now almost doubled in size. Cars were coming off the production line every 63 seconds when we visited; it will be under a minute by November.
We had 29 people sign up for the tour, which takes you through the stamping, robotic welding, paint, inspection, and assembly areas. Most of the tour is in the overhead catwalks, which offers a great view weaving between the 16+ miles of overhead conveyors hauling parts and vehicles. You get a chance to see body parts made from giant rolls of steel, a symphony of over 800 robots welding and assembling car frames and components, and then it all coming together into a finished product that’s driven off the assembly line. With over 4 million square feet of building space, we hardly saw it all but it still left both young and old amazed at how this small city of over 5000 workers creates soon to be 390,000 drivable vehicles a year!
Thanks to SIA for allowing us to book the group & giving us the great tour. Everyone that could make it loved it and we seem to have enough interest to do other group tours in the future.
The dooDad rocket fins are glued on the outside the rocket tube speeding assembly.
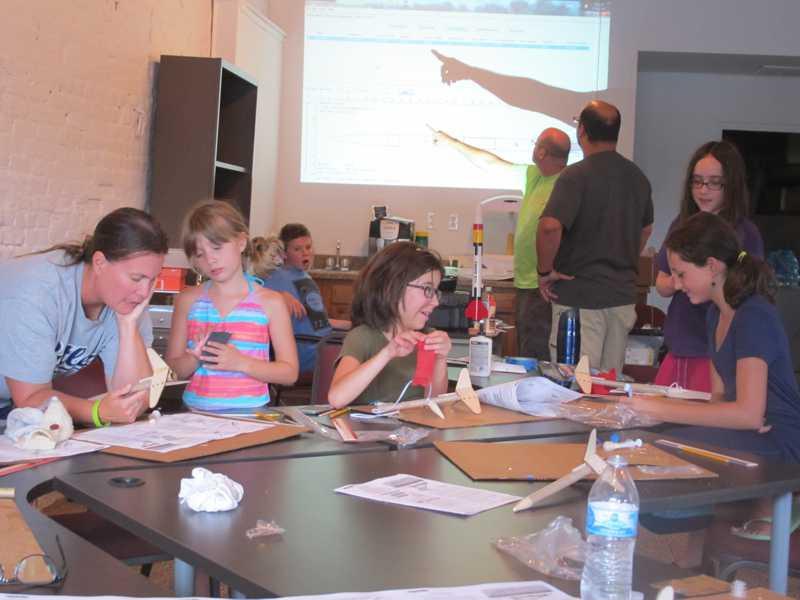
For our end-of-July Castlemakers Kids project, we built model rockets to be launched in August. Nick Adams led the group in building the FlisKit dooDad model rockets, a good rocket that first timers can get assembled in less than 2 hours. It uses laser cut basswood fins that are assembled on the outside of the rocket tube, making it easier to put together in a short period of time. The basswood fins (vs. balsawood) reduces the chances of fin breakage – they are quite stiff!
The kits were simple for first time builders. In the background parents discussed more elaborate designs.
The build was also our first class/event in the new Castlemakers makerspace in downtown Greencastle. We’ve got a lot to do before it will be open for use as a makerspace, but it’s a great location that with some tables and chairs worked well for the model rocket build. With our laser cutter/engraver on order for the makerspace, I kept eyeing the fins on those rockets thinking that soon we’ll be able to make those…
The rocket launch for these (and others) will be at Big Walnut Sports Park in Greencastle on August 27th from 3-5 pm. Feel free to join us on the east end of the park, near the Frisbee golf course.
A special thanks to Nick for doing all the research into model rocket kits for first timers, the donation of kits to our group, and his time in helping everyone build the kits!
Simple catapult testing built using 8 popsicle sticks and 2 wooden craft sticks.
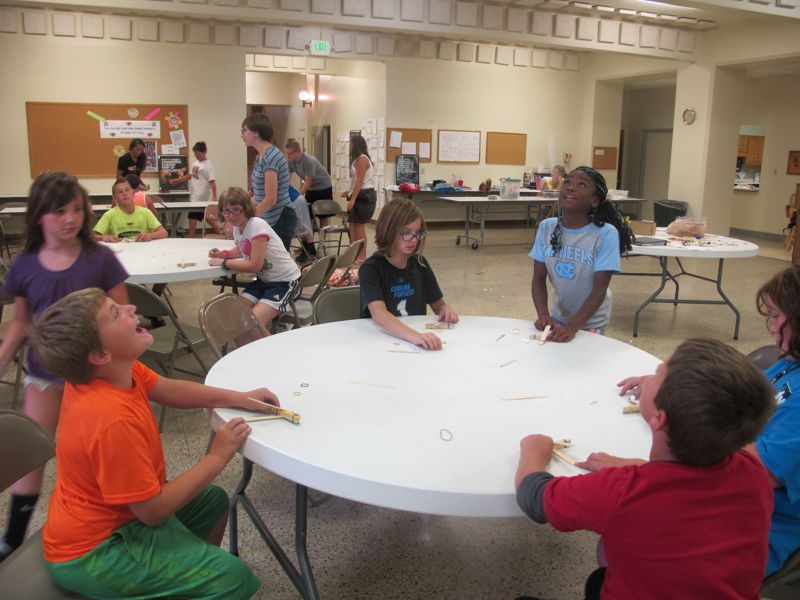
Last month we were asked to do a STEM (Science Technology Engineering Mathematics) related activity with the Summer Enrichment Program at Gobin Memorial Church. It’s a great program which provides positive interactions for at-risk kids in Putnam County. Their goal was exposing these elementary aged kids to a STEM activity; I also wanted them to make something that they could experiment with at home.
We originally looked at doing something with Brushbots, but it turns out those kits are hard to find now & pricey. For Castlemakers Kids we built our own from scratch, but didn’t have enough pager motors on hand & ordering in bulk would take too long. So I settled on making catapults using wooden craft sticks and rubber bands.
There’s a lot of different craft stick catapult designs, but we went for simplicity. Had to, there were more than 60 kids in two sessions – plus only around an hour to build them. The large range of ages, 2nd through 6th grade, meant some would get the ‘lesson’ and others would have no idea what I talked about, but at least they were exposed to it!
Testing an alternate wooden stick catapult design which uses a stronger spring.
After dropping a few names, like Galileo & Newton, I explained the basics of a lever using a see-saw example. Also mentioned Newton’s laws and apples falling from trees; then told them they were to decide which would hurl further – a marshmallow or a grape. This craft stick design can provide fairly consistent force input since everyone pretty much pulls it back all the way (who doesn’t want to launch it the furthest!).
The kids each build a catapult with 6-8 kids and 1-2 counselors helping at each table. It worked well, especially considering there wasn’t time to coach the counselors first. Everyone involved certainly had fun and when they’re exposed to levers and Newton in a more academic setting they will have heard of it. Lessons learned: Grapes have more mass than mini-marshmallows but don’t go as far & the model I made with a binder clip (stronger spring/more force) definitely shot things further. Mini-peppers… well things were degenerating at that point & we ran out of time.
We didn’t have enough bottle caps to glue on the throwing arm (they still work without them), and several of them were going to add when they got home so they could launch more. I also brought one with a longer lever (2 craft sticks), hopefully a few of them made those at home!
The June 20th Castlemakers Kids project, paper automata.
This week we explored the world of paper mechatronics (sometimes called automata or Karakuri in Japan). In the Castlemakers Kids meeting, using 2 sheets of paper cardstock, we created a cam/lever mechanism that caused a sheep’s head to nod when the crank was turned.
The kids cut out the parts from 65 lb cardstock then used glue and folds to create the assembly.
For thousands of years people have created mechanical toys and dolls out of metal, wood, or in our case paper. The primary use seems to be for entertainment and amusement, but it also offers incredible opportunities to teach people about levers, cams, gears, linkages and other mechanical mechanisms. Ever looked inside a mechanical watch, clock, or older film projector? You’ve probably seen a Geneva stop or Maltese cross (along with a lot of other mechanisms), but may not have known what to call it.
A completed paper sheep that nods it head when you turn the crank on the side.
We made a design created by Rob Ives, who has an UK website on cardboard cutouts, called “Agreeable Sheep”. It’s a cute model and uses a single cam along with a lever which nods the sheep’s head when the crank is turned. I can also heartly recommend the book Karakuri by Keisuke Saka if you decide to try a hand at making mechanical paper models. He covers how they work and has a wonderful gallery of karakuri that he and high school students in Japan have created. The tips and instructions for basic mechanisms are worth the price of the book if you want to try make different models or creations of your own.
I’m sure we’ll be doing this in the future again, there are plenty of other things to try. My mind is already buzzing about scaled up models could be made out of big sheets of corrugated cardboard…
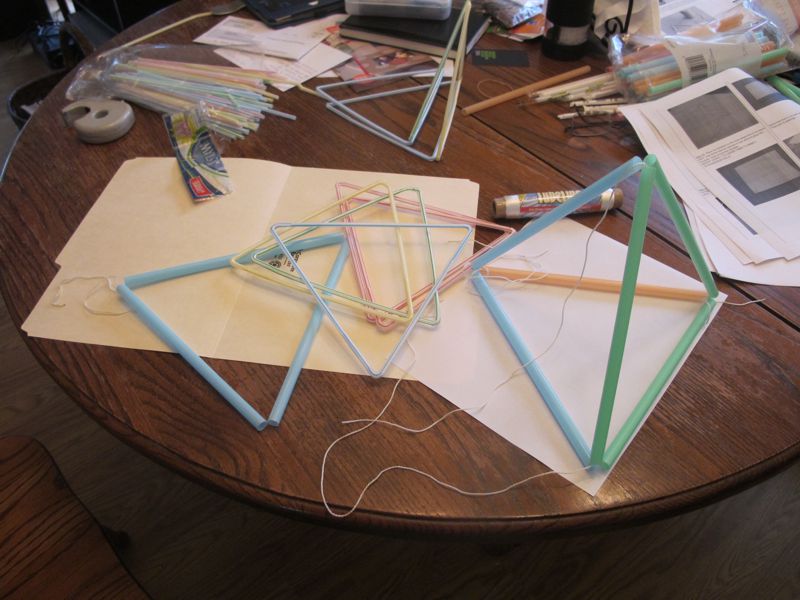
Several different drinking straw designs were tried to see what would be easiest to build.
After the big winds a few weeks ago, we decided to build some kites for our latest Castlemaker Kids project. For those not familiar with tetrahedral kites, the engineering behind the geometric design and history of Alexander Graham Bell’s involvement is interesting.
Alexander Graham Bell saw the Tetrahedral Kite as a way of getting to manned flight. Just before the turn of the 20th century, there was a big debate in the scientific community on whether human flight was possible. Kites were being used to test aerodynamics and flight stability for possible aircraft. After Lawrence Hargrave developed the box kite in 1893, Mr. Bell designed a tetrahedral kite in 1895, which was not only very stable but simple to expand and easy to fly. Mr. Bell wrote a National Geographic article in June 1903 on his new kite structure that explains the development and gives a comparison with other designs. He eventually created a steamboat towed 12 meter (40’) long 3,393 cell model in 1907 that carried a man 51 meters (168’) above the water!
Prototype tetrahedrons and cutout tissue paper. Building a template helps considerably. We used string to tie the straws and cells together, but designing a 3D printed connector to see if that could work.
There are lots of variations today – the design we chose was built using drinking straws, string, and tissue paper (Tyvek also works). Individual tetrahedrons are made out of straws, tissue paper is put on 2 sides, and then they are tied together in groups of 4 to make a building block. The 4 cell model can fly by itself but if you get ambitious 10 cell modules work well too, all of which could be attached together into larger tetrahedral kites. Instructions for a simple 4 cell model can be found here, but it can be tailored to the supplies available and what you’d like to build. To help with the kids’ attention span (and time constraints) we stayed with a 4 cell model.
Brian holds up his completed kite by the bridle. He used just one longer string for the bottom layer, the rest of us built individual cells and tied them together.
Finding non-bendy straws locally turned out to be a challenge, each 4 cell module takes 24 straws. The rest of the components are pretty straight forward, it’s just a matter of time and patience to assemble a kite. Once you figure out the pattern, the most difficult part is tying together the individual tetrahedrons with the string, in the version we used. There are several other versions if you search the internet, including one that uses flexible drinking straws, but the individual cells in the folding model are wired together. This makes assembly a bit more challenging and I found it harder to put and keep together, although the folding feature is nice.
A tetrahedral kite’s advantage is the low weight to sail ratio. Because of the shared trusses, as you add additional cells performance improves – what Bell saw in this design over other types of kites. And it’s easy to put multicolored paper on the kite, making a good looking kite. Don’t be surprised if you see some larger ones in the sky this summer in Putnam County!
The ‘whistlers’ (Ben & Carlie) share their designs and prints. The train whistle in the foreground didn’t turn out as planned, something every engineer has experienced!
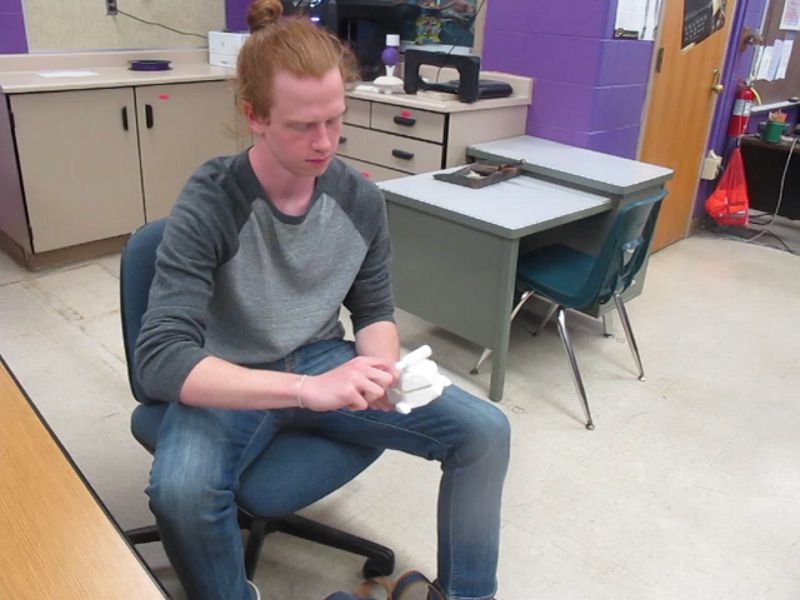
A high school Principles of Engineering class I visited last week is providing a great example using a 3D printer to teach the engineering design process and critical thinking.
Mr. Shields at Greencastle High School inherited a 3D printer when he took over a new class this winter. I had contacted him to see if he or his students were interested in a community 3D printing competition that Castlemakers is putting together. He was able to take the basic idea we had and turn it into valuable classroom experience for the students. Plus provide a pilot test for a future community 3D printing event!
Craig demonstrates his 3D printed güiro, a frog which resonates ‘ribbet’ when a stick is rubbed on its back.
The challenge was to 3D print a functioning device that would make noise or music. They had to walk through a seven step design process, print the part, and then write a report that included evaluation of their prototype by others.
The projects they made were impressive with whistles, a drum, ribbiting frog, and of course musical instruments. While all of them were good, perhaps the most impressive sounding was a musical instrument that 2 students collaborated on – Mattia designing and making a mouthpiece while Dalton did a horn. You can hear the mouthpiece/horn in this video.
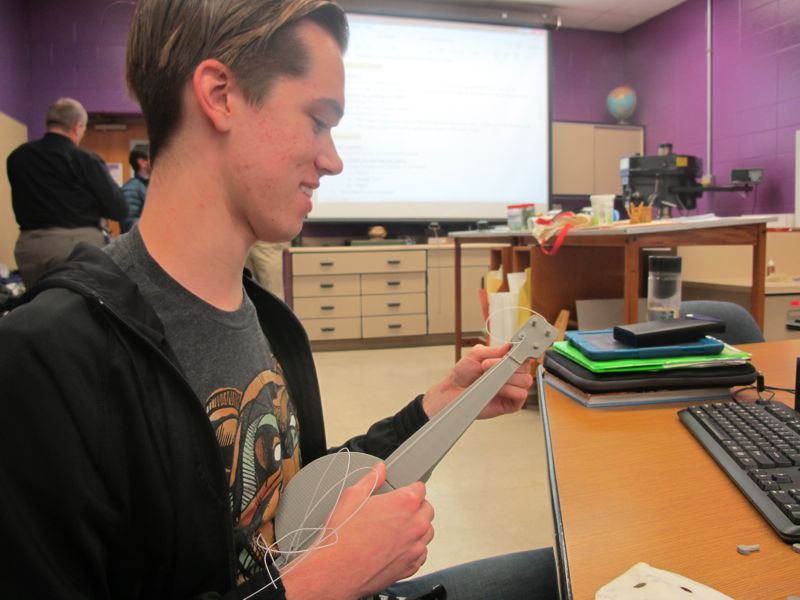
Justin H. assembles his banjo/ukulele. One of his tuning keys broke but of course another can be printed!
Piaget would be proud of the constructivist learning going on Mr. Shields’ classroom. It really shows how hands on learning and the maker movement can improve learning in the classroom. IU School of Education is embracing the movement, opening a new a makerspace(The MILL) last fall in the Wendell Wright Education building just for teachers. Not all learning goes on in a classroom however, and people need tools/equipment and a place to practice – one of the reasons that Castlemakers feels Putnam County needs a makerspace.
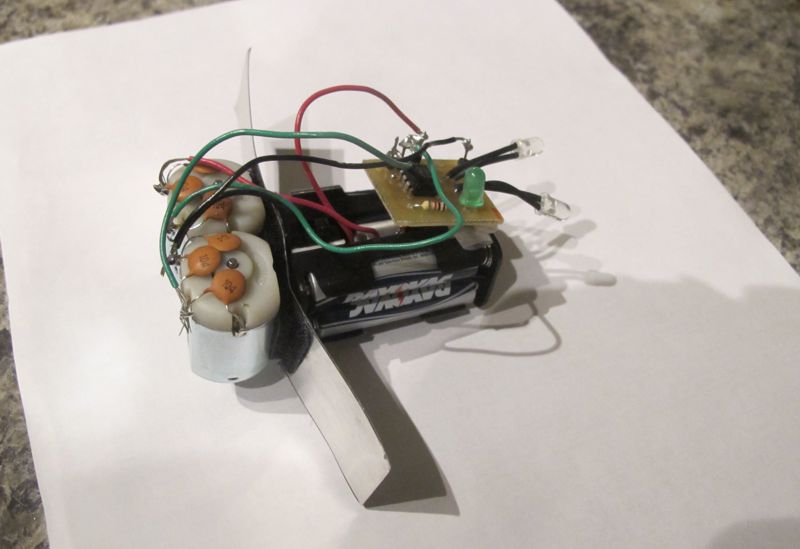
Wonderlab/Bloominglabs workshop on building a light seeking robot from motors, switches, and a few electronic components.
Another good regional resource for kids STEM activities is Wonderlab in Bloomington, Indiana. Besides being a fun place to visit, they also offer summer day camps for kids through 6th grade (and mentoring opportunities for those older) that can range from crazy contraptions and electronics/engineering to TV technology. They also have occasional special events, often on weekends or during school breaks, that anyone can sign up for.
A completed ‘BrainBot’ – light seeking robot based on the SunBEAM seeker robot. These use $7-8 in parts and the robot seeks out light using the two photosensors that drive the rear motors.
Bloominglabs, the community makerspace in Bloomington, put on a 3 hour Brainbot building workshop over spring break at Wonderlab for kids and adults. Since we had some experience teaching kids to solder, ended up helping with the workshop and now helping to improve the workshop instructions. Bloominglabs also helps the Monroe County Library with speakers for the summer Make It Digital series, put on Makevention every year, and have an open shop night every Wednesday evening for those interested in making.
As we work towards creating a Putnam County makerspace, the robot building workshop is a good example of what Castlemakers will offer. Of course a makerspace is much more than just classes. But the goal is sharing/helping people to learn skills with arduinos/microcontrollers, mechanical devices, 3D printers, and more. And with the right physical location that may include welding, woodworking, jewelry making… all things that makerspaces in other cities offer.
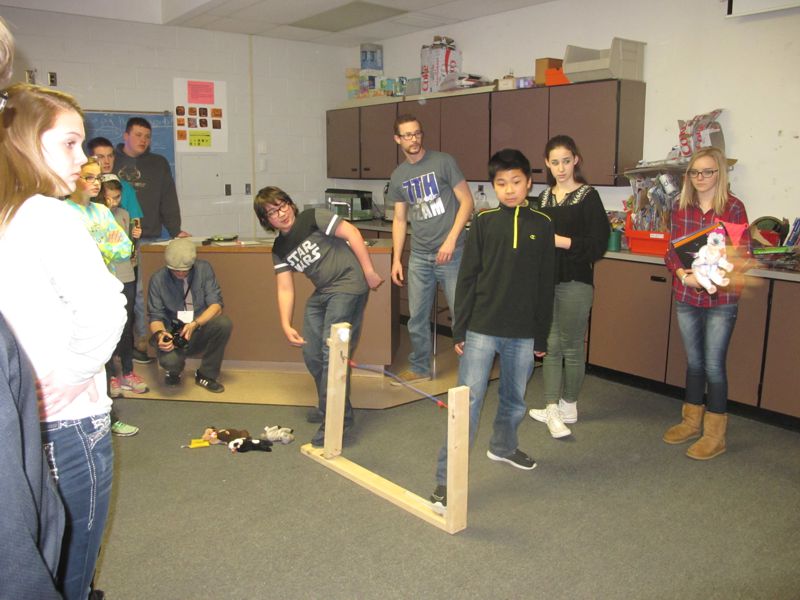
Yes, that is a flying pig in the photo! After working through the calculations of a hurling a wild boar, the students got to try firing various animals at a castle wall.
Yesterday, in conjunction with The Castle, we did a class workshop on catapults with the 7th grade science students at Greencastle Middle School. They were challenging sessions with both physics and mathematics involved, but the kids in the 7th grade science classes on Friday worked through the calculations to solve whether a 150 pound wild boar could be hurled across a 100 yard moat using a catapult. Their current curriculum was in the Newton’s laws of motion section, which they had to use to help answer the question.
With only a 43 minute class period to work with, we had to reduce the scenario to a fairly short calculation. The groups were given the wild boar launch velocity (100 ft/sec at a 45 degree angle) and had to calculate the flight time so the total distance traveled could be determined. For those that finished the problem quickly they could try to figure how the distance would change if a cow was instead launched, but that was a bonus item that most didn’t get to. We finished up by test launching a few stuffed animals in the classroom to see a simple catapult in action.
Special thanks to Mr. Wickerman for letting us into his classroom, to Kara Jedele from The Castle for arranging the workshop, and both Kara and Emily Knuth for helping in the classroom.
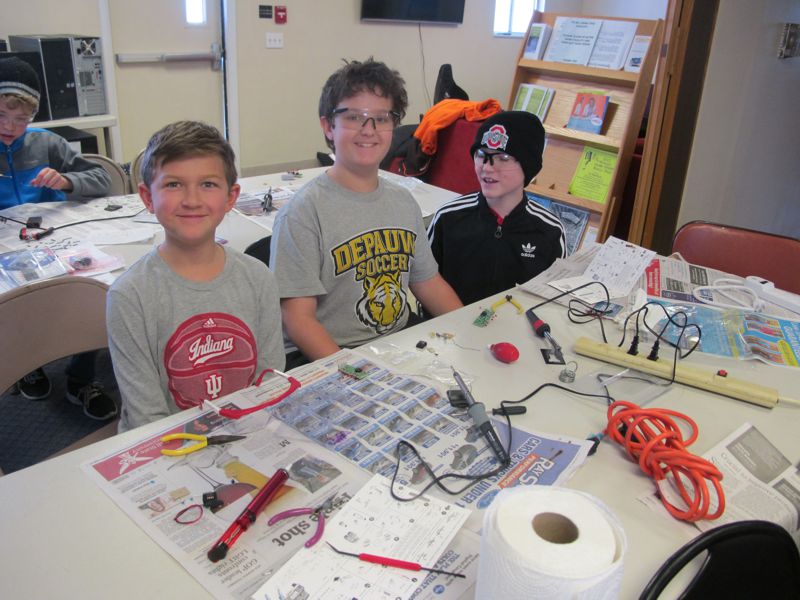
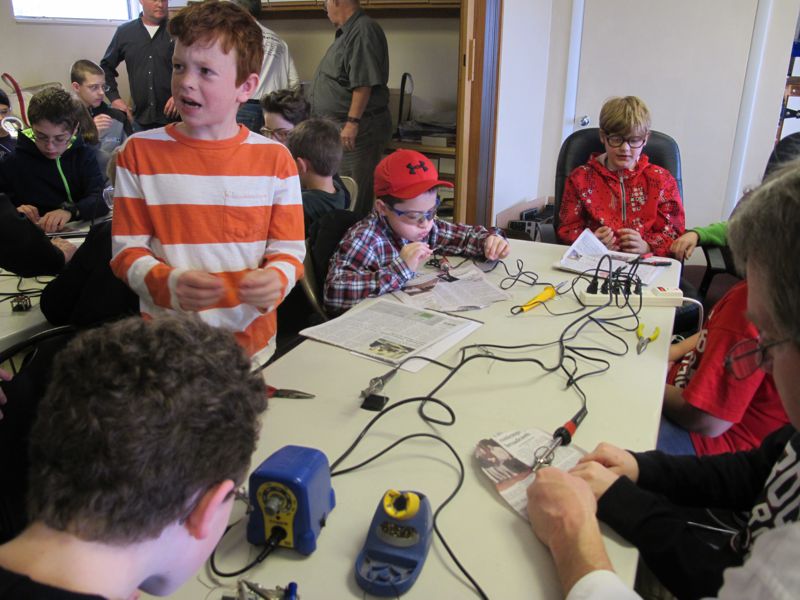
Despite the snow & cupid competition, we had some not-so-lonely hearts show up yesterday to continue learning and honing their soldering skills. This was our 2nd soldering session, during the first one the kids learned first by soldering wires together and then went on the kits. A little simpler kit with color changing/blinking lights was used this time for those that missed the first meeting or were quick to finish.
Newspapers were used on the tables, they quickly smoke/smell if a soldering iron is on them.
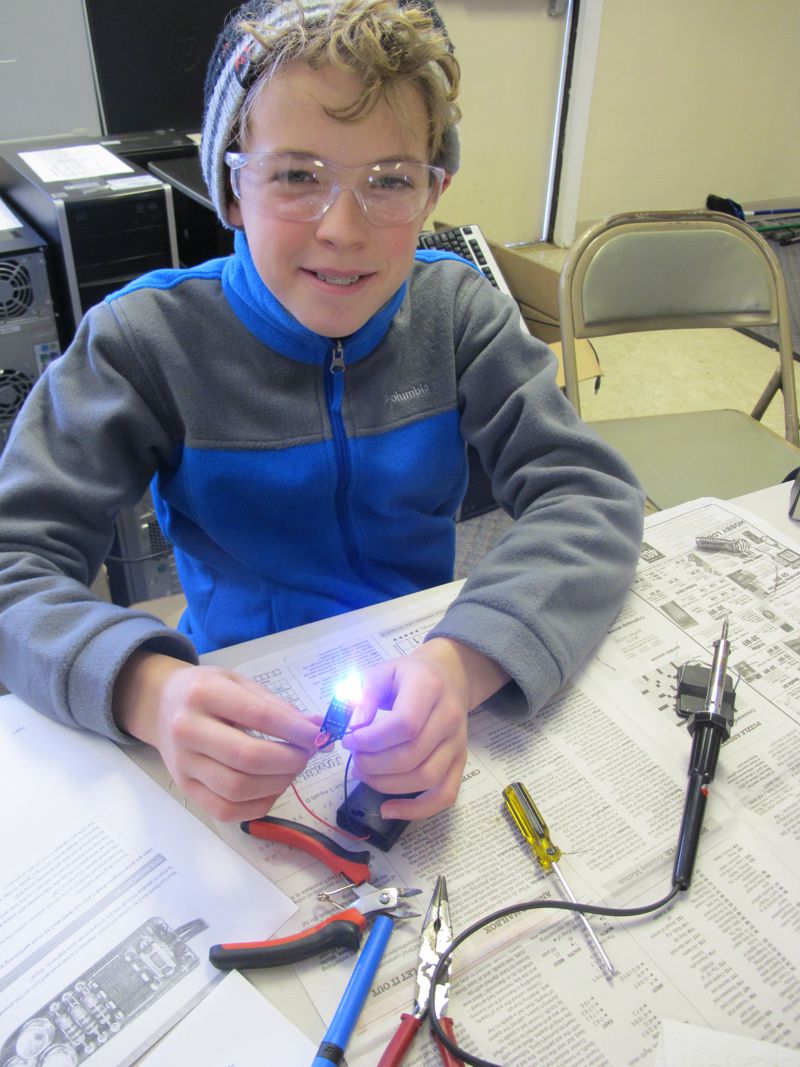
The LED chaser kit (Velleman MK173 rev2) was a medium difficulty build; in retrospect something easier for first timers would be better. But the coolness factor is very high, you can see it in this video link to Connor’s just after he finished. The socket helps protect the IC from overheating, but 44 solder joints is a lot to do. Solder pads are close together on both kits, not unusual, which offered opportunities for many kids to learn unsoldering techniques (some more than others). Glad we had a couple of solder suckers to clean up the bridging and over ambitious solderers! We also had one solder pad on one of the boards come loose but hard to tell if that was a circuit board problem or not.
Another completed RGB LED blinking kit.
The color changing LEDs kit (Lux Spectralis 2) was definitely simpler with 24 solder points, but was bought on clearance so now hard to find. It has 38 modes of color/flashing to choose from and could be easily finished under an hour or less. The IC (ATtiny13a, no socket included) held up well to overheating, least from our experience. One kit was short a few parts, something we’ll plan for next time.
We’ll be doing more learning to solder classes, this is a skill that generated an lot of interest from both young and old. Our next meeting will be using App Inventor again, part of our series building up to Arduinos and other microcontrollers.
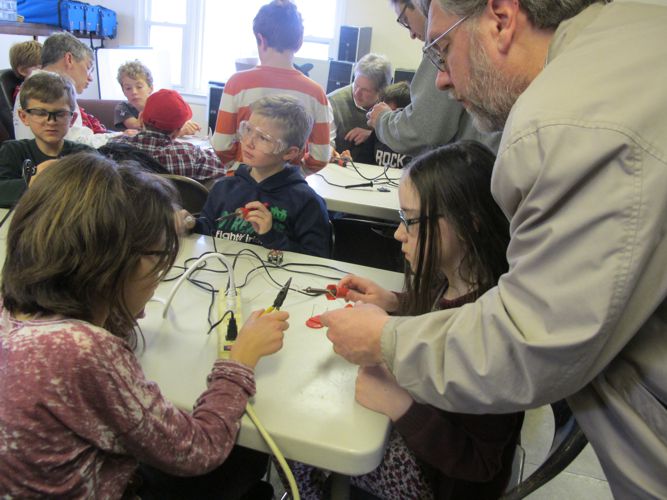
Our first ‘learning to solder’ session last Sunday drew quite a crowd. With 20 kids showing up and quite a few parents there too, we packed the FYCDP house on Crown Street. George Edenfield, who’s involved in Putnam County Auxiliary Communications and an active amateur radio operator, helped lead the session. Many of the kids brought their own soldering irons or borrowed one from a parent, but only a few had ever soldered before.
Before tackling the circuit board and electronic components, the kids practiced on soldering wires together.
After going through the basics and soldering safety, George had everyone solder two wires together so they could learn how to handle a soldering iron and learn how to recognize a good soldering joint. We then moved on to a small kit that creates a ‘chaser’ effect in 6 LEDs. The kids picked it up pretty quickly, although most needed someone to help them with the first soldering joint on the small circuit board. A few even got to learn how to use a solder sucker (desoldering tool) when they got a little carried away putting solder on the copper pads on the circuit board. Desoldering techniques, a possiblebackup topic if there was extra time, will be covered at a future meeting.
Another table starts their initial soldering task.
Although the kits didn’t get completed due to time and everyone helping each other, everyone kept saying how much they liked it and wanted to do more. So we’ll continue working on those that didn’t get it completed at our next meeting, February 14th, and for those that did or missed the Jan 31rst meeting we’ll have another simpler, quicker soldering project. It was so popular we ran out of the chaser kits.