Category Archives: STEM

Building Phone Apps

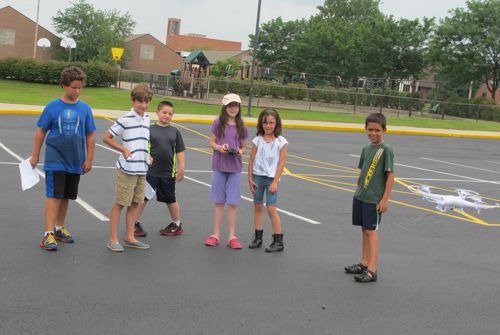
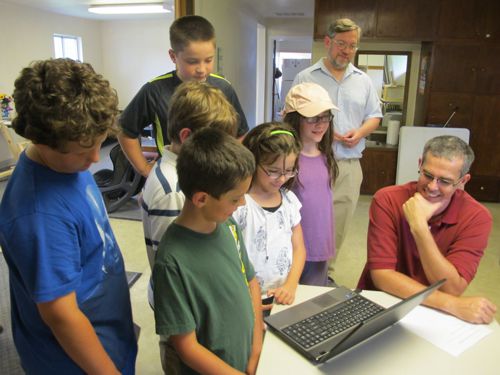
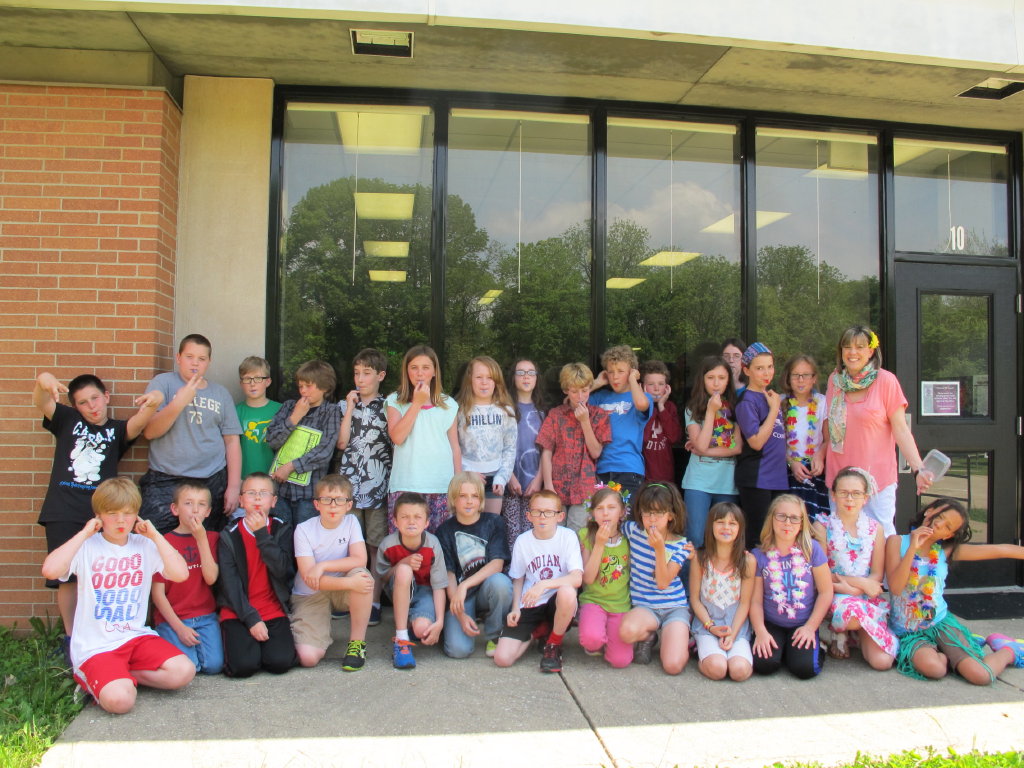
On Sunday, January 17, about a dozen kids learned the basics of coding by building some Android phone apps. We met in a computer lab in the Julian Center at DePauw, and worked through some of the tutorial apps in the App Inventor program from MIT (http://appinventor.mit.edu/explore/).

Screen Shot 2016-02-05 at 10.55.57 AM
Alice Howard’s “Magic 8-Ball”, which randomly says “Yes” or “No” when shaken

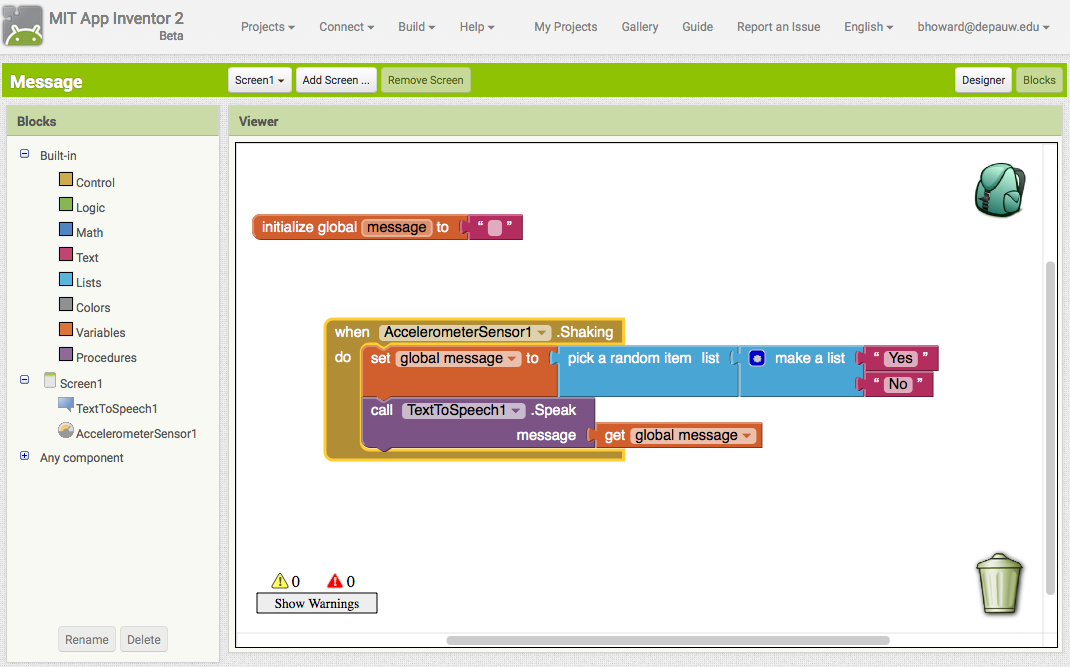
The system is programmed through a web browser, where you can build how the app screen will look (with buttons, labels, and connections to various phone sensors), then shift over to a “blocks” environment where the actions can be hooked up. The first example involved responding to the phone being shaken by sending some text to the speech synthesizer (such as, “Hey, stop shaking me!”).

While the app was being developed in the browser, an Android device (some kids brought phones, and the CS department loaned a bunch of tablets for the afternoon) was attached to the session and allowed immediate live testing of the program.

Screen Shot 2016-02-05 at 11.03.52 AM The second app we built was like a virtual billiards table. It drew some balls on the screen, and with a flick of the finger they could be launched to bounce around.

The App Inventor website allows sharing the projects that are created, and they can be turned into stand-alone apps to download to a friend’s phone. At the end of the hour, a bunch of the kids were excited about being able to continue working on their app ideas at home. Alice turned her random yes/no app into one that could generate a random story idea for a Doctor Who episode (example: “The Doctor and Rose battle the Daleks in New New York, accompanied by Captain Jack.”), and then worked with a friend to build a pair of apps that told each other knock-knock jokes (using a speech recognizer as well as the speech synthesis)!

App Inventor is related to the Scratch environment, which can be used to control Arduino boards, so it’s likely that there will be more sessions like this in the future.

Cardboard Virtual Reality

Google Cardboard Kit components. The magnets become a switch for the cell phone's magnetometer.
Google Cardboard Kit components. The magnets become a switch for the cell phone’s magnetometer.

Today we assembled some really inexpensive Google Cardboard kits and explored different 3D virtual reality programs that use a cell phone for viewing. By using the cell phone gyro for judging head movement and the magnetometer as an input device, with a little cardboard and a couple of lenses you can experience virtual reality!

We started with some ‘un-certified’ Google Cardboard kits, I suspect these are version 1 models vs. the latest version 2. These do not have the QR code that can help with configuration. These particular units don’t come with any instructions, which since they don’t strictly follow the Google Cardboard guidelines, made a little more challenging build. But really not that hard and adding some masking tape made them even sturdier. And they do work!

Rebecca discovers that the view is 360 degrees by looking up at the sky.
Rebecca discovers that the view is 360 degrees by looking up at the ‘sky.’ The adults are exploring what additional apps we can try.

The real fun began after Alice got her’s assembled first and then began wowing… everyone else starting racing to finish theirs. The technology is impressive and the demo app is a great place to start. There are so many more apps out there already that it will take some time to learn the best ones. Some of us old folks liked the Paul McCartney video app where you are on-stage for one of his concerts and can look around 360 degrees to watch things from the band perspective. Impressive fireworks and sound too! The VR Roller Coaster app was a hit with the kids, although I think all of them also tried the different cities in the demo, starting with Paris where you can walk around the Eiffel Tower.

Testing the Ozobot

Experimenting with ozobots & cubelets
Dunkin works on one of the prototype tests for the ozobot. A few cubelets are in the lower left corner.

In today’s meeting we looked at ozobots & dug out the cubelets to try and get the Bluetooth control working. Technical difficulties prevented the cubelets from  working with the remote control app. But the ozobots were a bigger hit anyway with both the kids and adults there.

Ozobots are tiny dome like robots that have optical sensors that are used to follow lines. These lines can also program the little guys, through shapes and colors. Using a marker they will follow the line you draw but by using different color patterns they will change speed, change direction, pause, stop and even count.

Castlemaker kids try an ozobot on the maze they created
Path that the kids developed to test the ozobots. In this trial it’s not doing so well, but has a chance to redeem itself if it gets the square root of 1 correctly, otherwise it goes into the “imponderable death of doom.”

It was amazing to sit back and watch the kid’s creativity. After a brief introduction to the ozobot, the kids discovered much more on their own. Following mazes and lines drawn on paper, along with guessing which branch the ozobot would take dominated the afternoon.

The kids decided to “test the robot’s artificial intelligence” by creating questions that the robot could ‘answer’ by choosing the right path. The maze they created started with simple questions like 4 divided by 4, then progressed into more difficult questions like which country created french fries. There were plenty of death traps and black holes along the path for the ozobot if a wrong decision was made. They decided to conduct tests for both ozobots , you can watch one trial in this video. Of course the robot didn’t really evaluate the questions, just took a random path, but they still had fun.

Castlemakers_Ozobot_Maze
The final test path they created. You can see one of the ozobots following the line near the top of the picture. In this trial it picked the correct answer for 4 divided by 4 and even chose the robot vs. human path.

The ozobot color changing capability was a huge hit (different colored lines cause the bot’s LED to match the line color). They are somewhat sensitive to line width, but it’s not a huge factor. The large dry erase board attempt didn’t work well, the bot would eventually scrape off some of the marker then stop. Ozogroove, the dancing app, was pretty useless on a Nexus 7 – don’t bother to install it on that tablet at least.

We’re going to have to experiment some more with hand drawing the ozocodes, the programming language for the robot. It seemed to be inconsistent, sometimes working and sometimes not, even for the same color coded lines. Printed ones worked great. There’s also a coding language, ozoblocky, but that will be a future meeting.

Model Rocketry in Putnam County

Rocket launch picture
Rocket being fired from pad #2, which was for some of smaller rockets.

Rocket launching was the theme of the day last Sunday for the Castlemakers that could attend. Nick and Emily Adams extended an invitation to a Rocket Launch at their place south of US40. Four families, along with some invited friends and Castlemakers got to see a wide variety of solid propellant rocket launches in South Putnam County.

Pad #1 was used for some of the larger rockets. Up to size G rocket engines can be used without FAA approval.

Amateur rocketry has been popular for years; many people will remember putting together Estes rockets as kids growing up. That still continues, with additional firms involved, with more gps units, cameras, electronics and even Arduino boards. Many of the tools used in a fab lab/ makerspace are being used! For an example check out the Carbon Origins effort (10,000 feet & Mach 2 before breakup); their story was detailed in a recent article. We didn’t see that kind of launch on Sunday, but there was a video of a Mach 1.5 flight Gus hit the day before at a site near Chicago (and he does a lot bigger rockets).

Gus Piepenburg mounts a camera on the side of number 13 before launch. It wasn't the lucky number of the day, the landing didn't go well and it will become number 14 with some improvements.
Gus Piepenburg mounts a camera on a model CM-10 Bowmarc before launch. The flight didn’t go well, landing in several pieces, and after changes it will become number 14.

What we did see on Sunday was incredible. There were four families that had built multiple rockets, all involved with Indiana Rocketry, and there were two launch pads and 4 towers to launch rockets. I noticed several with GPS units (one hit 2500 feet) and several had cameras. One even had the infamous 808 keychain spy camera, sometimes used in robotics, that had a 3D printed camera case on the side of the rocket.

The local Putnam County 4H has a rocketry group if you’d like to get more involved, or you can also contact the Lafayette-based Indiana Rocketry club which has even more information.

Liquid Nitrogen – August Meeting

What happens when you hit a marshmallow frozen at -196°C.
What happens when you hit a marshmallow frozen at -196C.

At our August 9th meeting we covered the Water Balloon Challenge, which is now up to 8 groups. Details on our project page, but they seem to be performing so well that we concluded that the Greencastle Farmer’s Market display in early September should be a demo, not the actual competition, since the Greencastle square may not be large enough!

What happens when you insert a balloon into liquid nitrogen. There's also a video where you see it shrink and then expand.
A balloon being shrunk by inserting into liquid nitrogen before re-expanding, the record was 4 times for one balloon!

For our ‘show & tell’ portion Chris brought liquid nitrogen in a dewar for experiments. After explaining describing liquid nitrogen and where it comes from, we poured the -196°C (-320°F) liquid over the marshmallows that Alice had brought in. We also froze a banana to drive nails into a piece of wood and then tried lots of things that kids and the adults suggested. Some that worked and some that didn’t!

A raw egg that was frozen first with liquid nitrogen then melted down during the meeting back into a normal uncooked egg.
A raw egg that was frozen first in the shell with liquid nitrogen then thawed down during the meeting back into a normal uncooked egg.

Freezing balloons was a big hit, the kids had tons of questions which you can hear and see in the balloon video that Brian H. took. For the coin collectors there, we showed how older copper pennies are more malleable at minus 200 degrees Celsius than the new copper plated zinc pennies – which shatter after hitting them with a hammer!

There’s another good regional event for science in Bloomington on 8/29, Makevention, along with some other events on our events page. Last year we took one of the shovercraft (shoveable hovercraft) to the Bloomington event and did demonstrations. It’s well worth the trip if even to just to look at what other people are doing.

Since we’re starting to look for projects after the Water Balloon Challenge, I can’t help but mention the Lexus created hoverboard that uses liquid nitrogen. I just watched a video (long version) on it, sort of outdid our shovercraft but a lot of more engineering in that design. Now that would be an awesome next project!

July 2015 Castlemakers Meeting

Alice tries flying Isaac's drone that he brought to the meeting.
Alice tries flying Isaac’s drone that he brought to the meeting.

At our July 26th meeting we shared and discussed the upcoming Water Balloon Challenge in August. Interested kids & adults signed up and there are 5 preliminary teams creating something to launch a 2″ diameter water balloon farther than you can throw it – but there are several more rumored to be forming and folks can join in at any time.

Some of the kids afterwards viewed the drone videos from earlier in the day. You can see one of them on our Youtube channel.

Special thanks to Isaac & Matt who brought their new drone for the sharing portion of the meeting. All the kids that wanted to try it got to fly it. We also learned that one is very durable!

Making Ideas from Art

While you hear a lot about STEM, many in the Making community talk a  lot about STEAM (Science Technology Engineering Art Math). Attend a Maker Faire or look at any Make magazine and you can’t help but notice how many artistic creations (how about an electric giraffe) are being made. Many of the same things shown at the bigger Maker Faires have also made appearances at Burning Man, arguably one of the most creative artistic community rituals that I’ve encountered.

Clay Sculpture by David Katz at Peeler
One of the traveling exhibits at Peeler Gallery.  This  temporary clay sculpture in 2014 by David Katz seemed to be attached to the walls.

A good Putnam County art resource is the Peeler Art Gallery on the DePauw campus. A lot of people forget about it and it’s open to the public for free. One of the current exhibits has some Andy Warhol photos and prints, but it changes every few months. If you look at this exhibit link read it very closely, summer hours are reduced from regular hours during the school year.  It’s not a huge gallery like IMA, but I’m always amazed at the quality of the exhibits at Peeler.

3D Printing & Math in a Classroom

Printrbot 3D printer in classroom
Kids look over the a mini-whistle being printed in their math class.

Last Friday I got to talk about how 3D printers work & demonstrate printing to a class at Tzouanakis intermediate school in Greencastle. A lot of the math skills being learned in 4th and 5th grade math, at least in the current common core curriculum, are used when printing on a 3D printer. Obviously simple length and dimensions are needed and almost all 3D printer software controls are entered using metric dimensions. In contrasting a 3D printer with an ink jet printer (which the kids all have seen) we could bring in how coordinates are used with the printer head so the plastic goes on the right place on the printer bed (some of the kids have already been plotting x and y coordinates on charts).

Cura Software Screen printing whistle
The Cura 3D software screen used to show some of the things taught in 4th and 5th grade math.

There was lots of other things briefly covered related to math & science, including how the software being used (Cura) estimates how much plastic will be used (both length and weight). By having them measure the diameter of the filament used, we worked through calculating the circle’s area and then volume so they could see how much plastic will be used. Some of the kids have been exposed to unit volumes in the current curriculum, and while it was covered pretty rapidly perhaps the rest will remember it when they get that in more depth next year.

We also talked about the temperature settings and how that melted the plastic, asking if the 206 degree setting was hot enough to melt plastic. Some of the children that have been overseas immediately recognized that this was in centigrade rather than degrees F, so we worked through a conversion equation so everyone could realize these were oven like temperatures.

Mrs. McCoy's Tzouanakis Class with their 3D printed whistles
Kids trying out their mini-whistles… outside!!

After printing out a mini-whistle, I then showed them how the scaling function could change the size with a few clicks and re-printed a larger whistle. Most of the kids guessed correctly that the larger whistle would have a lower sound/pitch, but there was a lot of looking around to see who was raising their hand when they were asked to vote.

A special thanks to Mrs. McCoy for allowing me to come into her classroom for the printing demonstration. The class was scheduled at the end of the day & each of them got a 3D printed mini-whistle. Hopefully their parents are still speaking to me! I certainly hadn’t realized how loud 28 small plastic whistles blown at the same time would be!! You can listen to it in a video here

Amateur Radio Convention

Dayton Hamvention Slow Scan Video Transmission from Balloon at 1000 feet

It’s that time of year again when amateur radio operators, descend upon Dayton, Ohio for the annual Hamvention. This weekend (May 15-17th) in and around Hara Arena 25,000 people or so will be there to learn things at seminars, buy, and swap things. This is the biggest event in the Midwest for folks interested in making anything electronic – although the focus of the event is on amateur radio. But if you’re interested in making things, especially electronics, someone will be there selling what you need (or what you want!). I’ve seen everything from electronic kits to build almost anything to Geiger counters, it’s an amazing gawkfest that even includes some military surplus (I remember the collapsible towers were a big item, literally, several years ago).

While you’re there it may be worth a stop at Mendelson’s Surplus in downtown Dayton to check out the 6 floors of surplus ‘stuff’ in their main building (their website doesn’t do the place justice). And of course the USAF Air Force Museum, which I’ve written about earlier, is a great stop to make it an awesome STEM weekend – that’s worth a trip on it’s own.

This Friday we’ll be doing a 3D printer demo for a class at Tzouanakis intermediate school in Greencastle to show them how math is used in making 3D models and prints.  Will also be bringing the Printrbot printer to our next general Castlemakers meeting, which is being set up for late May.

Making Persistence

raspberry pi case 3D print
3D printed Raspberry Pi camera case that will be used with Octoprint to monitor/control a 3D printer.

One of the things that makers (and good entrepreneurs) have is persistence. It’s a basic part of the DIY (Do It Yourself) culture, you don’t give up even if you don’t know exactly how to do it. A fair amount of uncertainty and vagueness are expected, you simply believe it will work out in the end. Even if it doesn’t work the first time. Or the second.

I’ve been going through a lot of that in building a 3D printer the last few months. Picked a kit versus a fully assembled so I’d learn more about how they work. But have to admit, there has been several times that I’ve felt like throwing in the towel. Even with good documentation it’s hard to cover every possible wrong step. And the technology is still… ‘developing’…

What has been a key has the online 3D printer community. When I had a problem with a z-axis nut that wouldn’t fit, others with the problem confirmed that grinding off some metal would fix it. When my first prints had problems and I posted a picture of the problem, I had detailed suggestions on what to change in the software parameters within 30 minutes of my post!

But writing out detailed questions and getting answers still takes more time than talking in person. While I love the sheer number of people you can reach with an online post, it still has some disadvantages versus talking to an expert in person or sharing what you’ve learned with others directly.

A local community of makers could help that. There are at least 3 other groups of people here in Greencastle using 3D printers that I know of and I believe there are more. We need to create opportunities for people to share their experiences and help the knowledgebase to grow.

Castlemakers as a group is exploring some events to do exactly that, including a local competition for 3D printers and designers. If you have an interesting in helping, please contact Chris directly or send an email to chris@castlemakers.org .