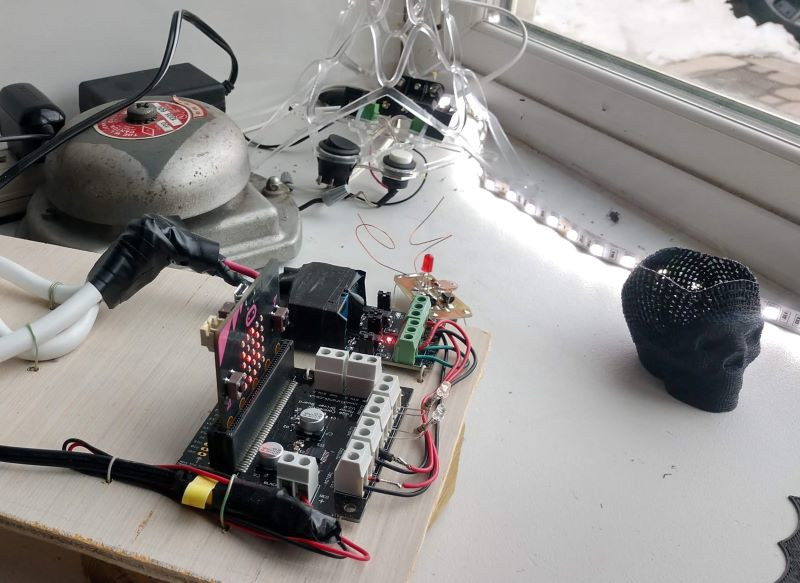
micro:bit with a relay controlling an alarm bell & LEDs.
Now we’re able to have classes at the Makerspace again, last Saturday there was a free ‘Intro to micro:bit’ class for anyone interested. It went well, with several attendees liking it so much they signed up on the spot for our next micro:bit class which will cover the device in even more detail.
This coming Saturday, May1st at 1 pm, we’ll cover using external devices with a micro:bit, including hooking up light strings, switches, and even a motor to the single board computer given to all 6th graders in Putnam County. This will be an all ages class however, the simple and powerful IoT like device can be programmed by anyone from 8 to 80. We’ll have everything you need for the hands-on class where you’ll learn to control a string of neopixel lights and no previous experience is needed. Learn more about it on our classes webpage.
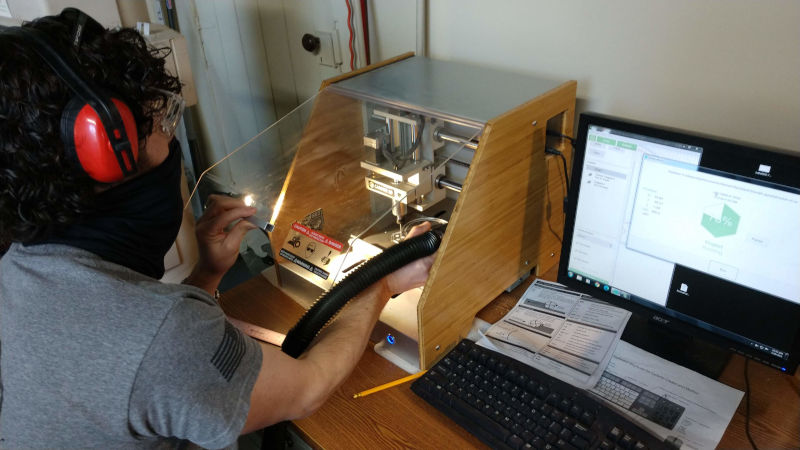
Machining the aluminum bracket on our Nomad 883. You can see videos of the CNC in action on our Youtube channel.
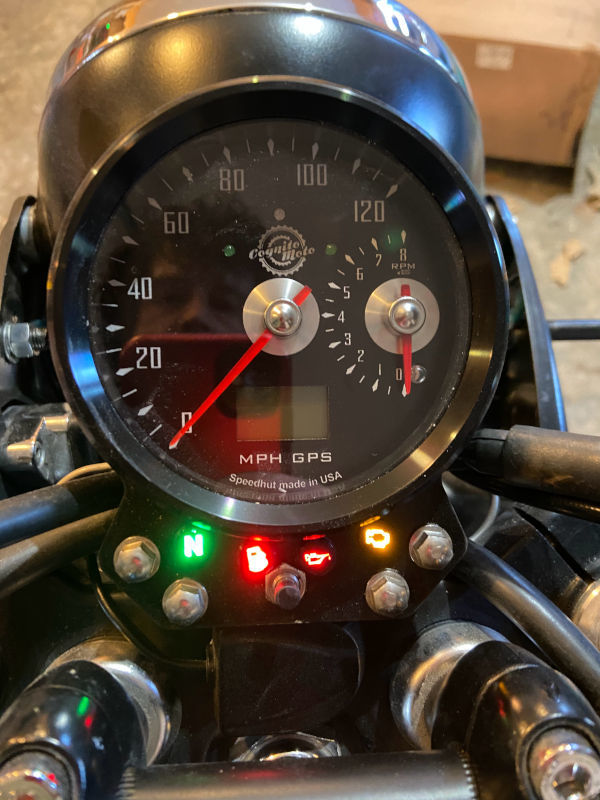
We’re certainly excited about the new electronic equipment capability at Castlemakers, but the makerspace is not just electronics. One of our members, Dan, asked about making a bracket for his 2009 Triumph motorcycle to install an upgraded combination gauge for the stock speedometer & tachometer. We’ve only done a little aluminum machining, and it can be a very slow process, but if you don’t try you’ll never learn what you can do!
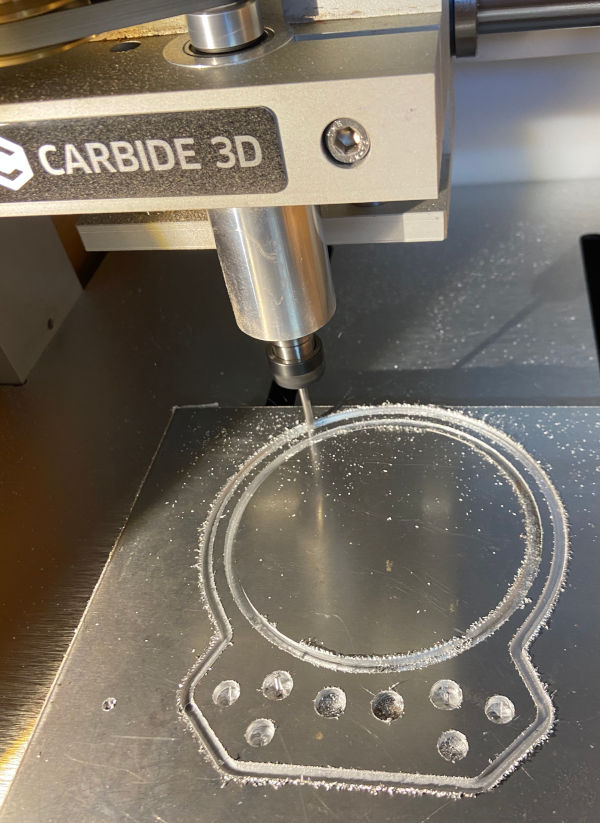
Aluminum plate machining into a bracket.
The original gauge included some warning lights, which he wanted, but weren’t part of the upgraded combo gauge so they were purchased separately. So Dan needed to create a new bracket design to hold the new gauge and lights.
Finished Triumph bracket.
I’ll let Dan take it from here: “I used Adobe illustrator to make a vector file of the shape I wanted, along with holes for mounting the bracket and indicator lights. I made a prototype on the laser cutter, and after a few small adjustments, we made the final version out of 3mm thick aluminum with the Nomad desktop CNC. There are still a few little tweaks I might make to get the spacing perfect (I ended up having to hand-drill one more hole for a button I had forgotten about), but I’m happy with the result. Couldn’t have done it without Castlemakers!”
LED lamp at Castlemakers in Rainbow mode, the colors change continuously in this video.
Pointing out the new ping pong ball lamp in the Castlemakers window on Franklin Street is a natural follow-up after writing last month about the micro:bit in the window. It’s a great fun, low cost project built by one of our member with items found at the makerspace, except for the ping pong balls.
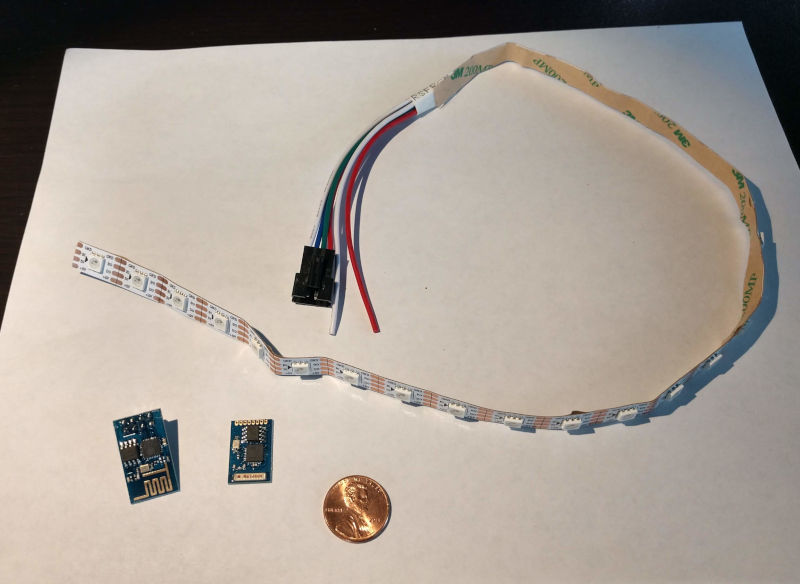
Example lamp components, penny included for size comparison to the ESP8266 modules.
Recently several of us started experimenting with ESP32’s, a ‘system on a chip’ device that’s less than $10. I’m working on a squirrel proof bird feeder using an ESP32 with a camera for squirrel recognition, more on that later. This project is built however with an ESP8266 module, predecessor of the ESP32, which cost even less. The ESP8266 modules, bought some time ago for $4, are still quite capable having both wifi and a control channel built in. Ian, who’s known to build things for the heck of it, turned an ESP8266, a bit of leftover led strip lights, some 3D printing, ping pong balls and some glue into a flashy user controlled lamp!
Webpage for lamp controls if you’re logged into our network.
There was mathematics involved in figuring out the right way to spiral the LED strip up the side for tight ping pong ball spacing, which depends on the diameter of the 3D printed cylinder. What’s also impressive is the built in web server. If you’re at the makerspace and logged into our network, type http://pingpong1.local to change the lamp pattern. Pretty darn impressive for a $4 circuit board!
We’re thinking about creating a class to help folks build these. If you’re interested stop by to let us know, post on this blog or send us an email.
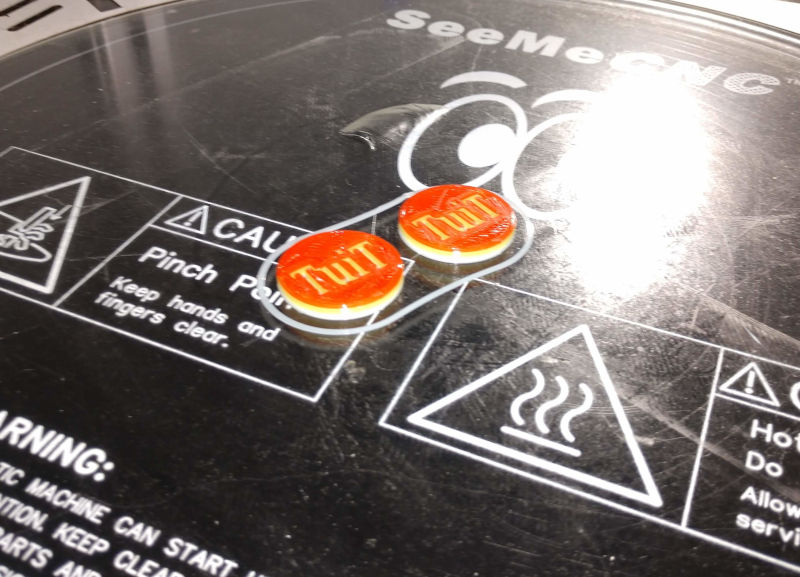
Multi-color Round Tuits designed in January 3D printing by class attendee David.
It’s exciting to be able to offer classes again, even though with a reduced size and constraints due to Covid. Introduction to 3D Printing will be offered on January 23rd at 1 pm and our popular Introduction to Laser Cutting/Engraving on February 20th. We’re hoping there’s also interest in some micro:bit classes, refer to our classes page for more information.
We’ve continued to experiment, a lot, with the micro:bit since giving them away to youth in the fall of 2019. The micro:bit capability is still impressive for a device that size. In the window of our Franklin Street location you can see several micro:bit projects, including some that have been written about before.
Window micro:bit that remotely flashes lights & rings an alarm bell!
One of the more mysterious window projects uses the micro:bit’s internal bluetooth radio. There’s been a micro:bit for some time that sends scrolling text and can control a string of lights and a rather loud alarm bell if the right text is sent wirelessly from another micro:bit to the window unit.
Hint: the words to send are obvious, it’s easy to program in MakeCode, and use Radio Set Group 1. It even works from outside! I’ll link later to some more detailed additional help.
This year we decided to pitch in and help Main Street Greencastle’s Santa in the Park project by making holiday ornaments to give away in Santa’s gift bags. We’ve held classes in making holiday ornaments before, so it seemed like a natural fit with one big difference. Instead of making 5-10 ornaments designed by class attendees, we needed to make 500 ornaments for the gift bags in 2 weeks or less!
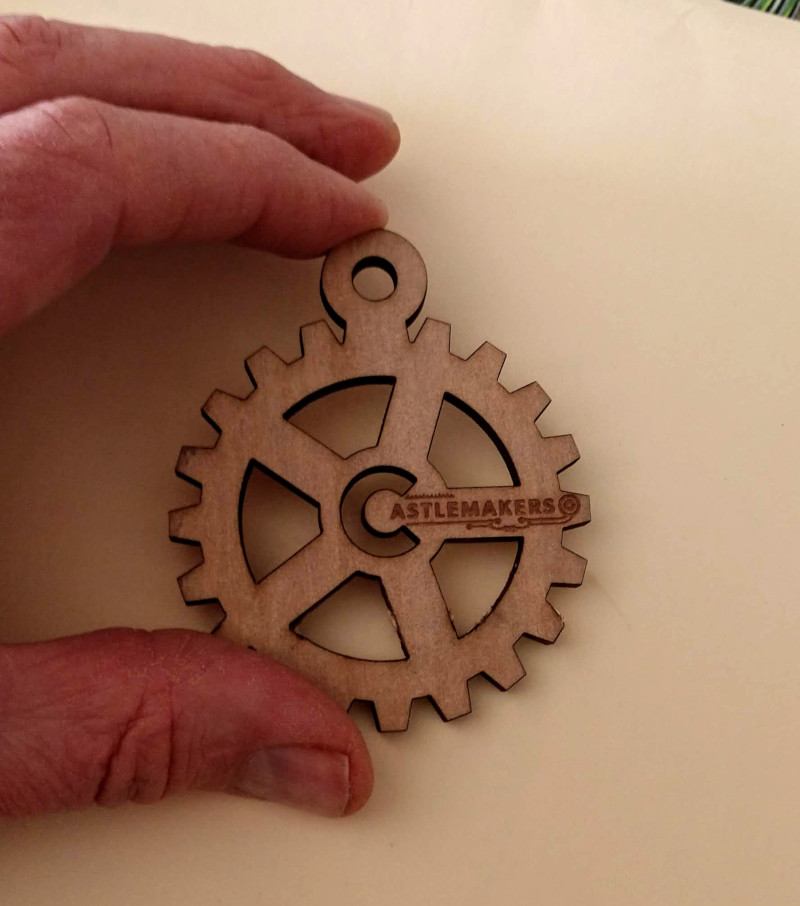
Closeup of the final laser cut wood ornament design .
3D printing the ornaments, which we’ve done in our classes, was out due to the time constraint. Recently I helped a local entrepreneur make his parts for a new product idea on our laser, creating a little over 150 pieces in 15 minutes. They needed to be extremely precise and were slightly smaller than ornaments, but that had me thinking this was the way to go. What we needed was a simple to engrave & cut design that could be done in a reasonable length of time.
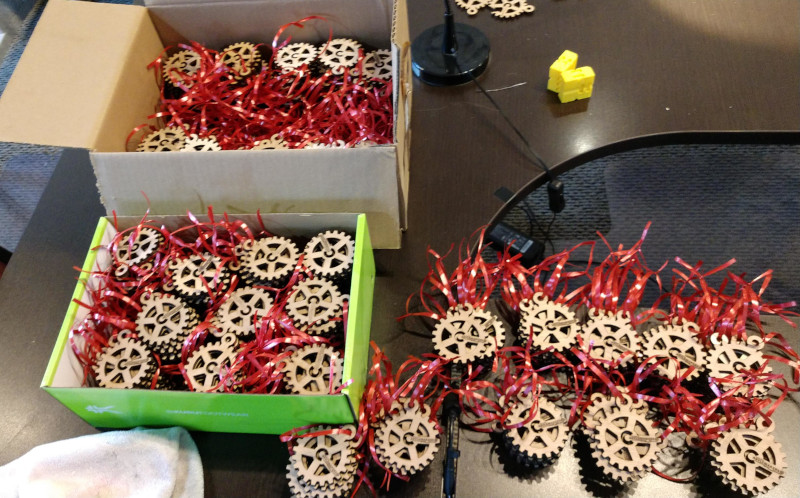
Getting first batch of holiday ornaments ready for delivery.
A local high school student, Hyrum Hale, came up with design that with a few modifications we could use. Our first prototype in green acrylic looked nice but wasn’t really visible on a tree, plus enough acrylic was hard to find due to Covid. Getting it to engrave/cut quickly required additional work; size of the ornament, material choice & availability, laser settings, and laser bed calibration/set up all were factors that determined time per ornament, quality, and repeatability. Making 500 items of anything means you learn a lot!
Although the cutting/engraving time was still substantial, we made the deadline and are really excited for our first time doing this. There’s a few extras at the Makerspace if you’d like one. We’re also already thinking about a new design for next year…
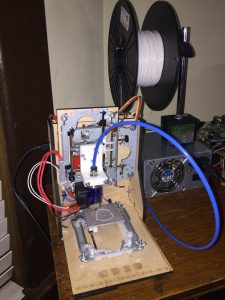
One of our more prolific makers, Ian Girvan, recently created a 3D printer using mostly scrap parts found at home and at Castlemakers. It’s impressive, using old computer CD-ROM and DVD drives for their stepper motors and mechanisms along with a second hand computer power supply.
What a great way to learn about 3D printers, brings to mind how the first consumer level 3D printers were created in the early days of the RepRap movement. I’ve been watching in awe the last few months as he figured out how to make the old parts work, only buying a very few new items like the hot end. He’s detailed some of his work for us on this webpage, it’s definitely worth a look!
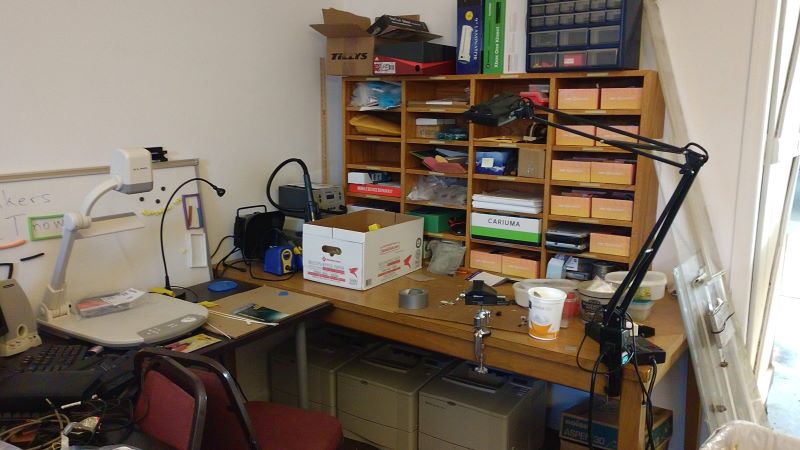
Electronics workbench area at Castlemakers which includes soldering station, hot air reflow station, lab bench power supply & document camera for closer component inspection.
Thanks to a generous gift from the Walmart Foundation and our local Walmart Distribution Center, we’ve been able to build on our previous electronics experience and add to our capabilities. In September we received a grant to expand our electronics and single board computer/IOT equipment (like the micro:bit) at Castlemakers.
In the back of the makerspace we’ve added a new electronics workbench area plus will soon be adding more soldering equipment to teach people about electronic components, circuits, and their repair. For several years now we’ve taught a learning to solder course for youth and adults, plus often had youth programs where they can experiment with electronic devices. Not all of the equipment is in yet, but we can already now work with small circuit components and perform troubleshooting.
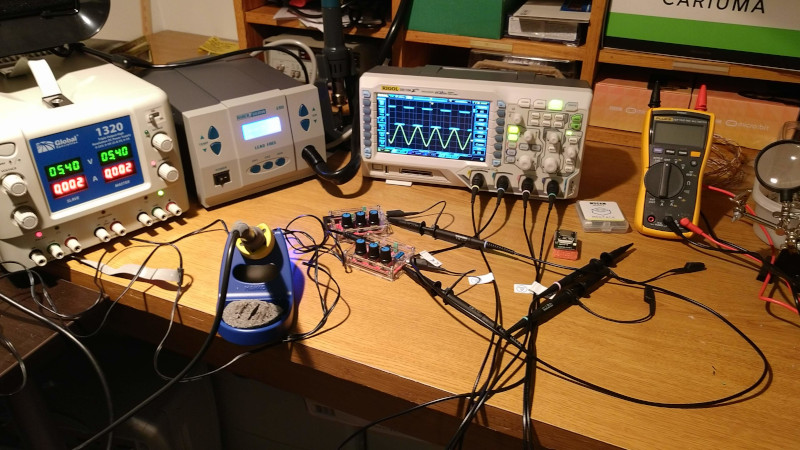
New oscilloscope added in December, includes analog & digital options. Christmas came early at Castlemakers!
Part of our mission is encouraging new skills in the community through projects and hands-on classes. Are you or a group interested in learning more about electronics? Contact us, perhaps we can work something out for you or your group here at Castlemakers!
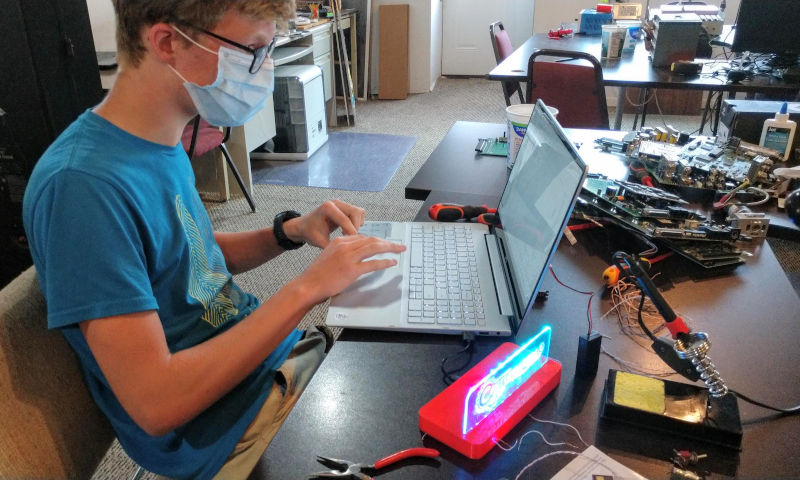
We’ve still had projects at Castlemakers this summer, even with the Covid shutdown hampering our hands-on education efforts. One that I’m excited/impressed with is a high school student built project that includes programming, electronics, 3D printing and using a laser cutter – all made with items at the Makerspace!
Programming the micro:bit to control the LED light strip using MakeCode, a block based programming language.
Ever since we gave every 6th grader in Putnam County a micro:bit last year, we’ve wanted to do more micro:bit projects to help youth and adults see the power of microprocessors and IoT devices. And to get a chance to expose and use some of the some different fabrication tools often found in a makerspace. This summer Hunter Miller made a really interesting project, an edge lit sign controlled by a micro:bit. It looks a bit like an emergency exit sign with a disco like effect and instead our logo on it.
The design and case was modified from something created at the Cambridge UK makerspace, who was looking to create something to experience the different makerspace tools. We used our 50W CO2 laser to cut and etch an insert for a 3D printed case that with led lighting on the edge makes our logo stand out. Hunter, who was looking for something else to do this summer, then cut a section of a 2m LED strip and after some soldering connected the wires directly to a micro:bit. Then he wrote a micro:bit program using MakeCode that makes the LED strip change color and intensity.
Color scrolling mode using addressable LED strip controlled by a micro:bit.
It’s on display right now in our front window on Franklin St. Stop by and take a look or come in and we’ll show you how it works – the different lighting modes may have you dancing!
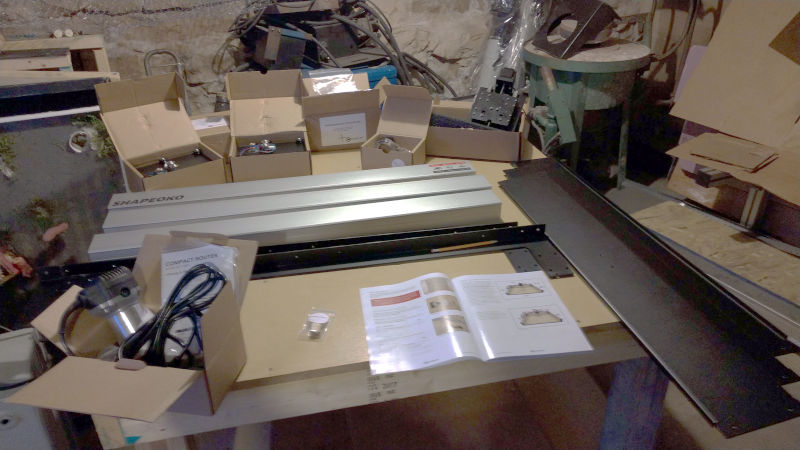
Parts that we received to build our latest CNC addition.
With the Covid-19 virus slowing down our activities, we’ve used the time to make some additions and upgrades at Castlemakers. Plus catch up with some of the work it takes to keep an all volunteer, non-profit makerspace running.
One of the more exciting additions has been a larger Computer Numerical Control (CNC) machine, a Shapeoko XXL. CNC’s have been used in manufacturing for years to make things in factories. More recently, like 3D Printing, the design, control, and cost of CNC machines has gotten to the point where desktop units are feasible. Although our latest addition is awfully big for a desktop with a 3.5×4’ (1×1.2 m) footprint!
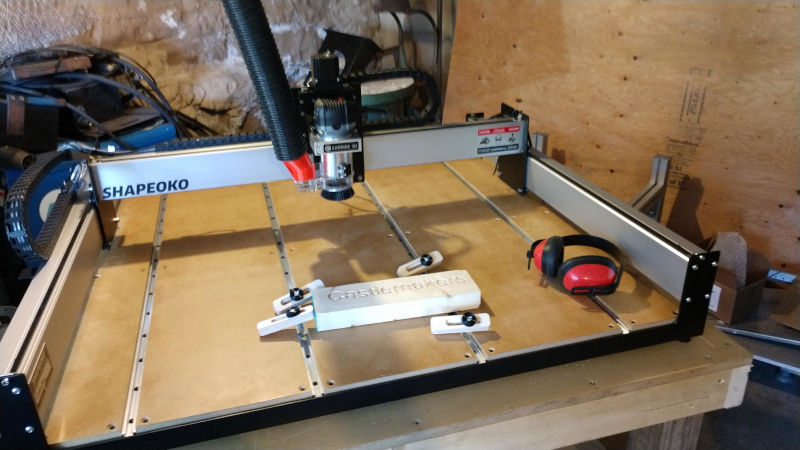
Assembled CNC after cutting first test part with v-groove end mill. Red dust hose adapter was 3D printed at Castlemakers.
Prepping the room downstairs has taken some time, including improving electrical, airflow/dust control, and creating a big sturdy table to hold the unit when cutting/machining things. After cutting our first piece on it, the potential is very exciting. Most folks will use it for wood and plastic materials, but the rigidity, precision, and end mill rotating speeds makes metal possible. There’s already at least one member who’s planning to make guitar bodies our new one. And of course we’ll be offering community classes once we can start those again.
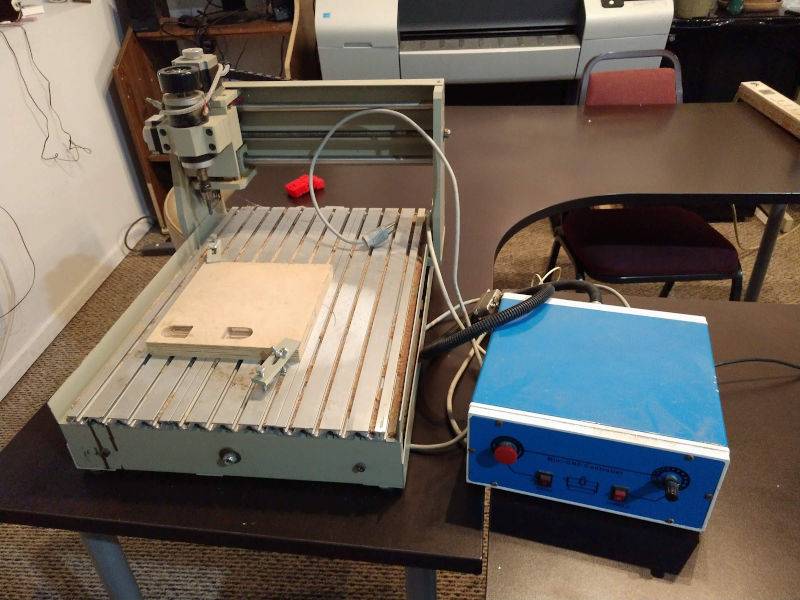
CNC table and controller that was given to the Makerspace.
We’re given a lot of different things at Castlemakers, from old scrap electronics to tools, often so they don’t go to waste or for kids to tear down and learn… and maybe a few adults. Sometimes we can even retrofit the parts into something more current.
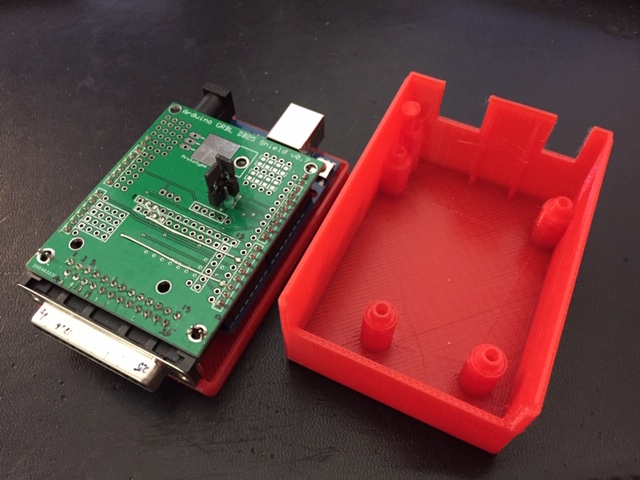
The mini-CNC now uses an Arduino/GRBL based USB to parallel port interface so it can use standard G-code.
In March, Sam Williams of Cloverdale, who had brought his son to our CoderDojo, dropped off a box of parts that included a no-name, imported desktop CNC that hadn’t been run in several years. Where he works, a Terre Haute CNC shop, several folks had bought a few to learn CNCing. He no longer used his so gave it to us for parts or to use. It was an older model that used a parallel printer port and special control box on a Windows XP machine he also gave us.
Arduino GRBL shield with 3D printed case Ian designed. Captive reset pushbutton is at the upper left corner.
One of our members, Ian, decided to get it running. By using an Arduino and a $15 controller shield, he’s been able to get it machining using a laptop and free open source software via a USB port – a big improvement! He even designed and 3D printed a case which has a print-in-place button to press the onboard reset button.
You can see it if you look at the table through our front window; adding limit switches is the next addition. After that we’ll put it in the front window on Franklin St. for a while before using it in classes, it’s a pretty good machine to learn about CNC’s.