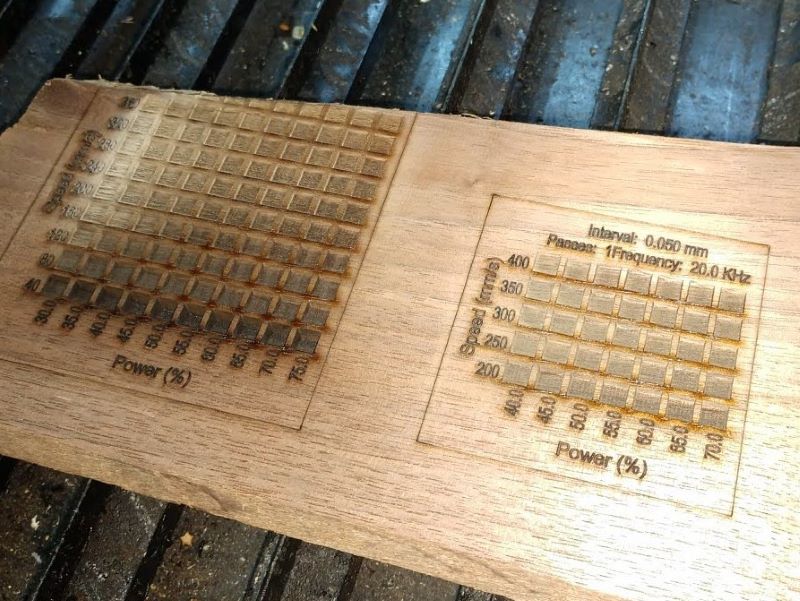
Power vs Speed grid to determine proper levels for the desired depth & darkness in black walnut wood.
One of our members wanted to make a commemorative plaque for his church using the CNC and laser engraver at Castlemakers. I volunteered to help, thought it would be a good chance to use our bigger CNC with some newly updated software and we could both learn in the process.
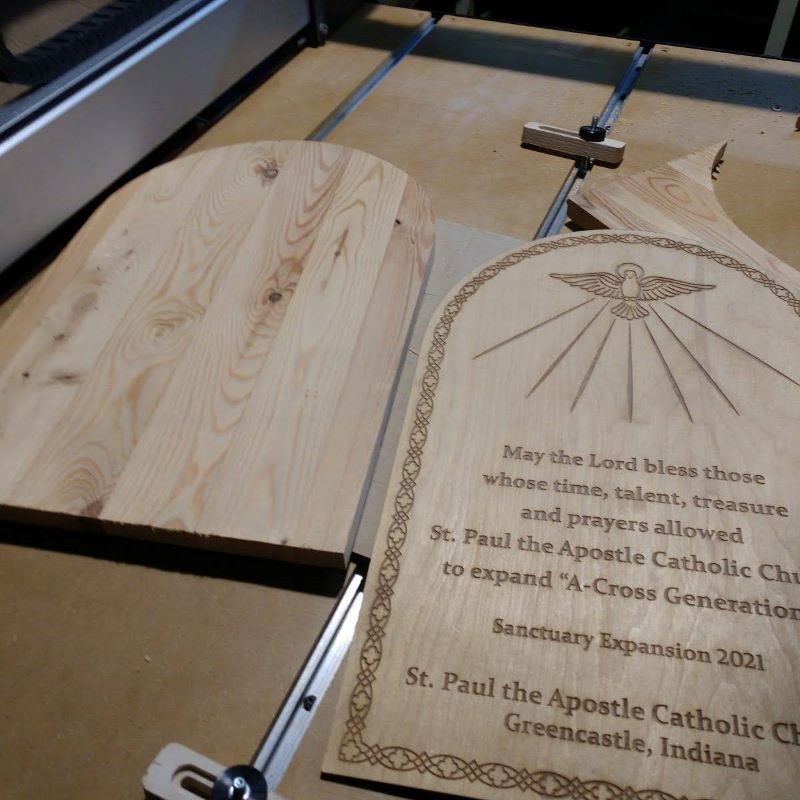
First engraved prototype in plywood next to a full thickness pine cut out on our CNC.
Given the nice wood they wanted to use, doing several prototypes with lower cost wood seemed in order. It also would give him something to show the church committee approving the plaque. Ed was able to locally source some rough cut black walnut wood and another member Ian used his planer so the wood could be glued to an appropriate width.
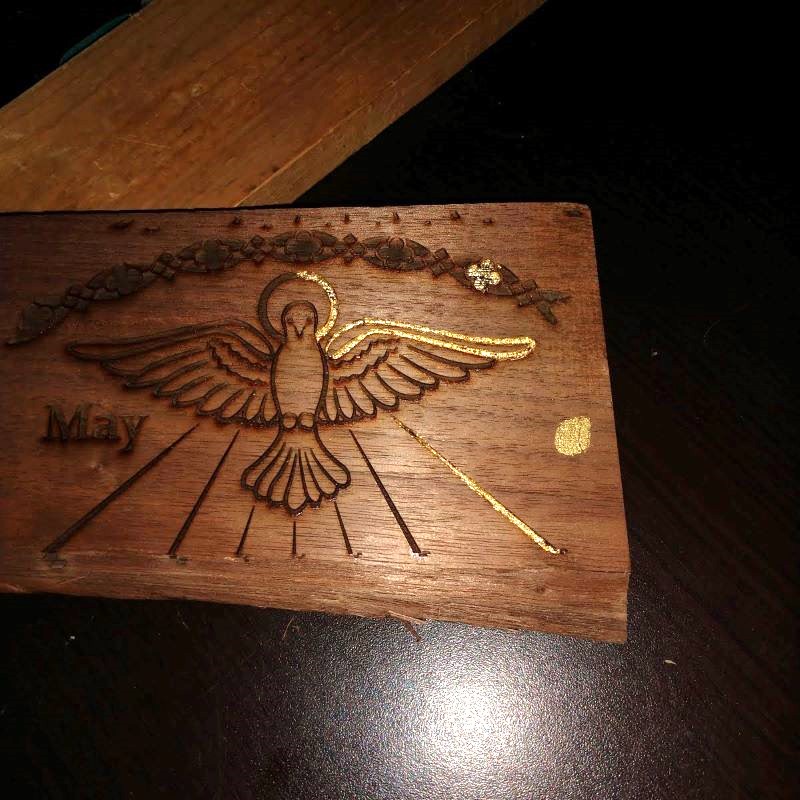
In the meantime one of the other church members created a great looking design for the engraving. For the first prototype, done in birch plywood, we just used the laser to cutting the shape to show others for approval. This resulted in a few minor changes and a decision by the group to add gilding to part of the dove and the rays on the plaque.
Black walnut test gilding before changes.
The final plaque is on darker wood, so we engraved a sample portion on some scrap black walnut and it’s a good thing we did! The original rays were too thin, making gilding extremely difficult. Now with the final design was completed, another prototype was made in pine the thickness of the final plaque to make sure the CNC portion of the project was going to work with the engraving.
Now that our larger CNC has been moved upstairs we’re starting to see some more interesting projects being made at the makerspace. Some of them have been more traditional woodworking projects, sometimes updated with a technology twist. For Valentines Day we had a teenager who made an oak box that he lined with LED lights to backlight the lithophane he created that was mounted on top of box. Haven’t heard yet if the recipient liked it, but I was definitely impressed!
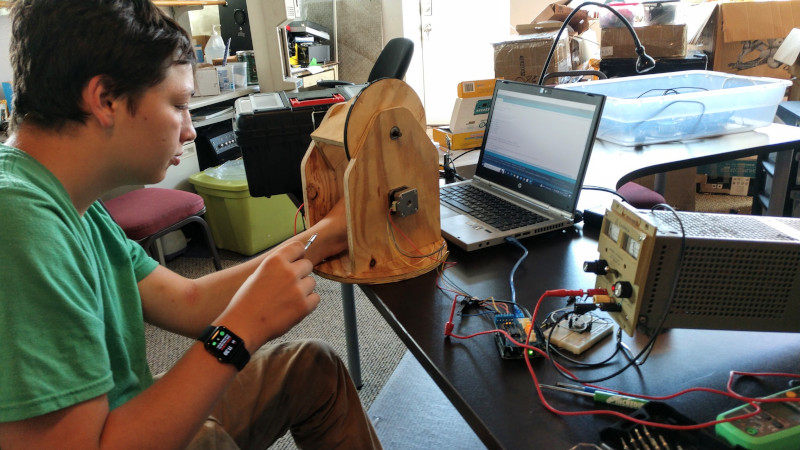
Assembly of a remote controlled Nerf gun turret made on our CNC
We also saw another interesting use for the CNC several months ago when someone made an remote control NERF gun turret. The design was done in Fusion 360 and the main parts were cut on the CNC so the stepper motors could be mounted directly into the wood. The final device allows remote control aiming and firing of the nerf gun. We could use one of these at the makerspace!
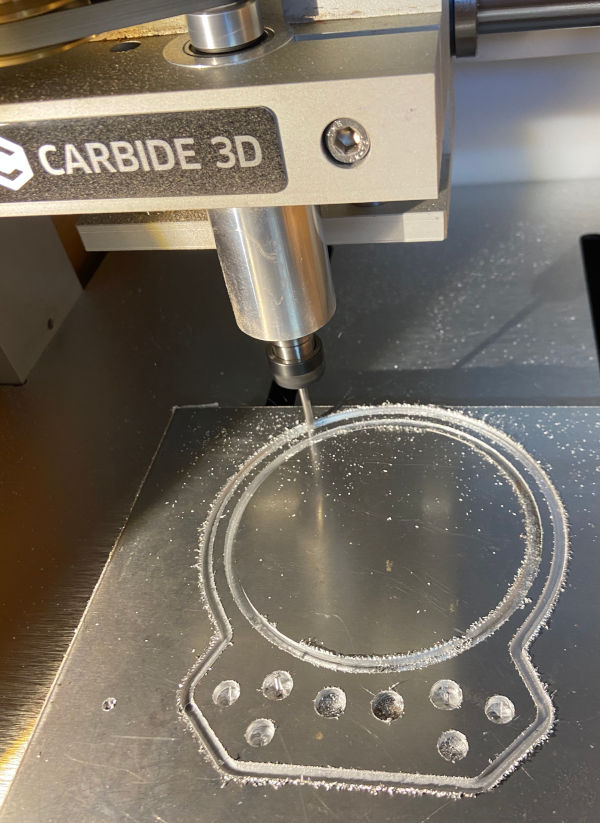
Machining the aluminum bracket on our Nomad 883. You can see videos of the CNC in action on our Youtube channel.
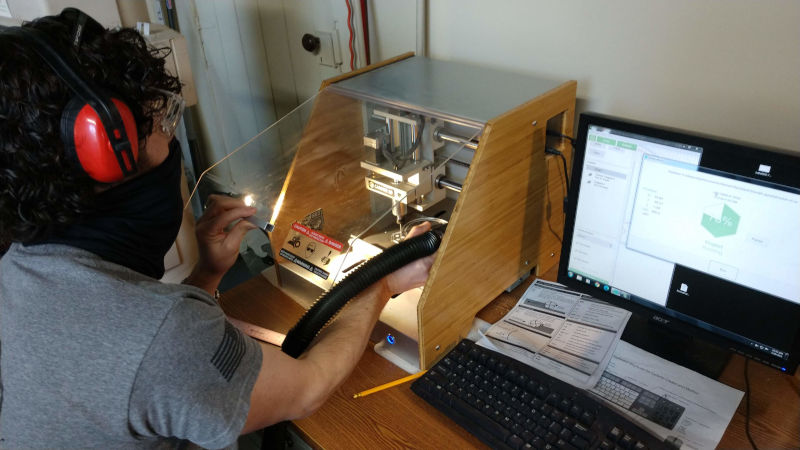
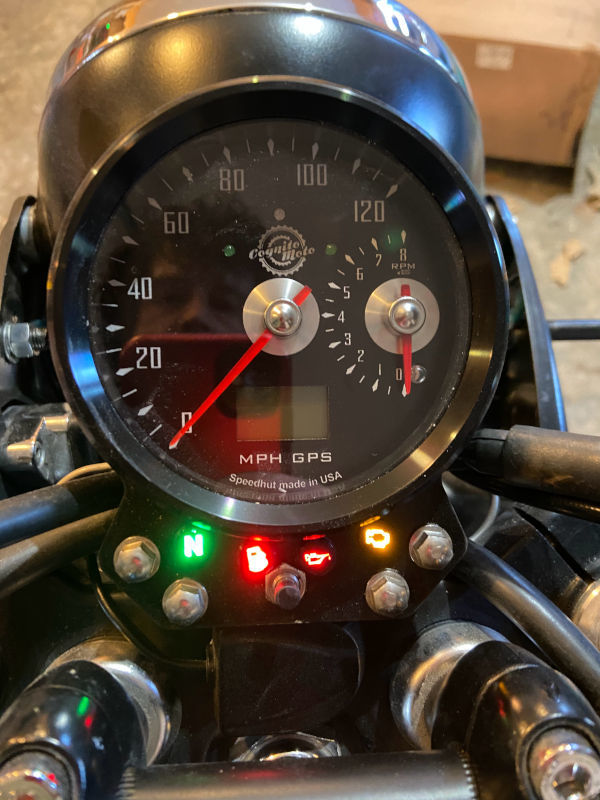
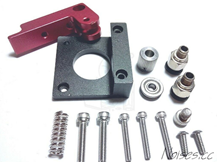
We’re certainly excited about the new electronic equipment capability at Castlemakers, but the makerspace is not just electronics. One of our members, Dan, asked about making a bracket for his 2009 Triumph motorcycle to install an upgraded combination gauge for the stock speedometer & tachometer. We’ve only done a little aluminum machining, and it can be a very slow process, but if you don’t try you’ll never learn what you can do!
Aluminum plate machining into a bracket.
The original gauge included some warning lights, which he wanted, but weren’t part of the upgraded combo gauge so they were purchased separately. So Dan needed to create a new bracket design to hold the new gauge and lights.
Finished Triumph bracket.
I’ll let Dan take it from here: “I used Adobe illustrator to make a vector file of the shape I wanted, along with holes for mounting the bracket and indicator lights. I made a prototype on the laser cutter, and after a few small adjustments, we made the final version out of 3mm thick aluminum with the Nomad desktop CNC. There are still a few little tweaks I might make to get the spacing perfect (I ended up having to hand-drill one more hole for a button I had forgotten about), but I’m happy with the result. Couldn’t have done it without Castlemakers!”
Some meandering thoughts on successfully building a 3D printer based on old DVD laser head linear movement mechanisms and an old PC power supply:
Background
Greencastle Makerspace has a great selections of 3D printer options (https://castlemakers.org/about-us/equipment/) to allow members and interested members of the public to get hands on experience with this Fuse Deposition Modelling (FDM) additive manufacturing technique. With 3 actual printers to choose from it all with varying sizes and mechanical designs, one might think that as a member, there wouldn’t be much desire for anyone to roll their own. But sometimes as they say, sometimes it’s the journey not the destination that provides the most enjoyment: – or at least the most learning opportunity.
The other activity that has some momentum at the Makerspace in recent months is the addition of CNC capabilities. In addition to the Carbide 3D Nomad, and more recently the Carbide 3D Shapeoko XL, we were gifted a generic 3040 type desktop CNC/router. (http://castlemakers.org/one-persons-trash/) This CNC had the disadvantage of requiring a legacy parallel port from a host computer. All though this could have been arranged, we felt that a better option was to retro fit it with a GRBL controller that has a number of advantages including being able to be used by any of the PCs at the Makerspace and not requiring any drivers of software that is getting progressively outdated. This exercise got me impressed with what has been achieved with open source Gcode parsers and machine controllers with cheap and ubiquitous embedded controllers such as the Arduino range of boards.
In conjunction with this, there seems to be an ever-increasing amount of outdated or superseded technology devices that end up in landfills or otherwise need to be dispose of or (hopefully) recycled/reclaimed to reduce potential environmental impacts.
Reclaiming Hardware
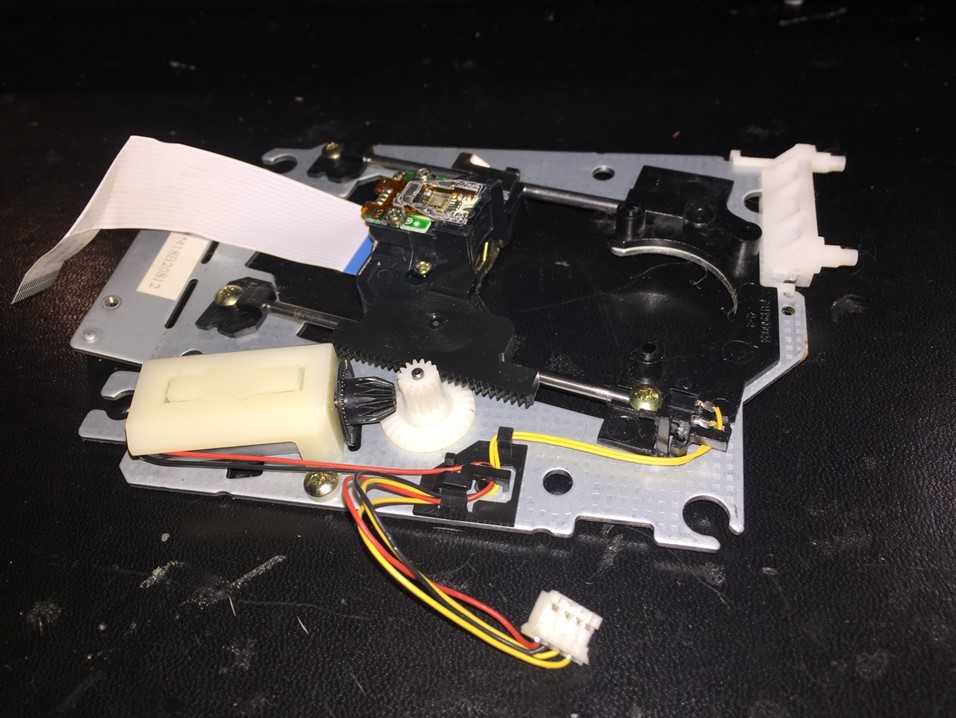
With this a background in mind, I started wandering around google looking for options to use old commonly available electronic legacy components to create a 3D printer. What I discovered was a good number of examples of people using the head positioning systems from particular CDROM/DVD drives to successfully produce small print volume 3D printers. (To see some of these take a look at the links at the end of the post.) Using this as an inspiration, I decide that I’d get my hands on some DVD drives and see if what I had seen on the internet could be reproduce with minimal financial out lay. To this end I made a trip up to the attic, move the Christmas decorations, luggage and other various totes until I discovered a couple of PCs that had seen better days. A few minutes later I had a couple of potential DVD candidates in hand and returned to start the disassemble. What I found was a little disappointing. I was hoping to see some small 4 wire stepper motors combined with small carriage on rails carries the laser heads, all driven via a small diameter lead screw. What I found was the later models that used a standard (and no doubt cheaper) standard DC motors.
Back to the search.
A quick review of the computer hardware in the Makerspace, came up with 3 potential candidates and with the luck of the Makerspace, they all had stepper motor-based mechanisms. The basis of the 3-axis movement was in hand: – time to “glue” it together in some fashion.
Framing Things Up
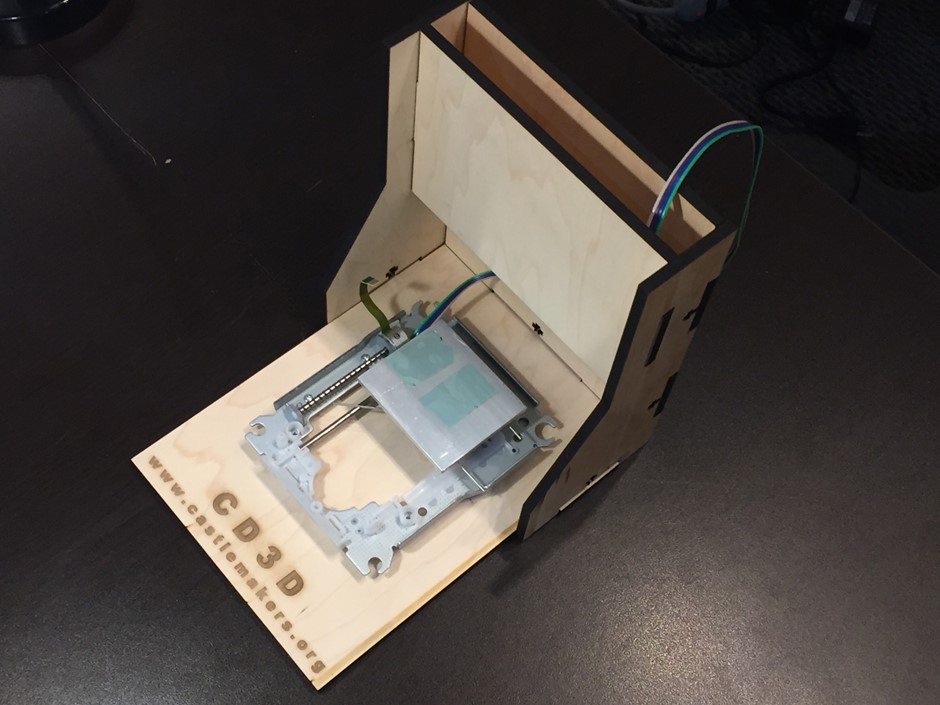
In my Google travels I came across a design for a laser cut frame for this type of printer. Give the Voccell laser (https://castlemakers.org/about-us/equipment/ )is another one of the tools at the space I decided I’d make a couple of adjustments and press that laser into action to produce a plywood frame.
The Hot Stuff
One of the key pieces of a FDM 3D printing process is the hotend mechanism to heat up and extrude the filament on the bed or build plate. Also to ensure the initials layers of filament stick to the bed, the use of heated bed is often used and allows printing materials that would otherwise be challenging to get to effectively adhere.
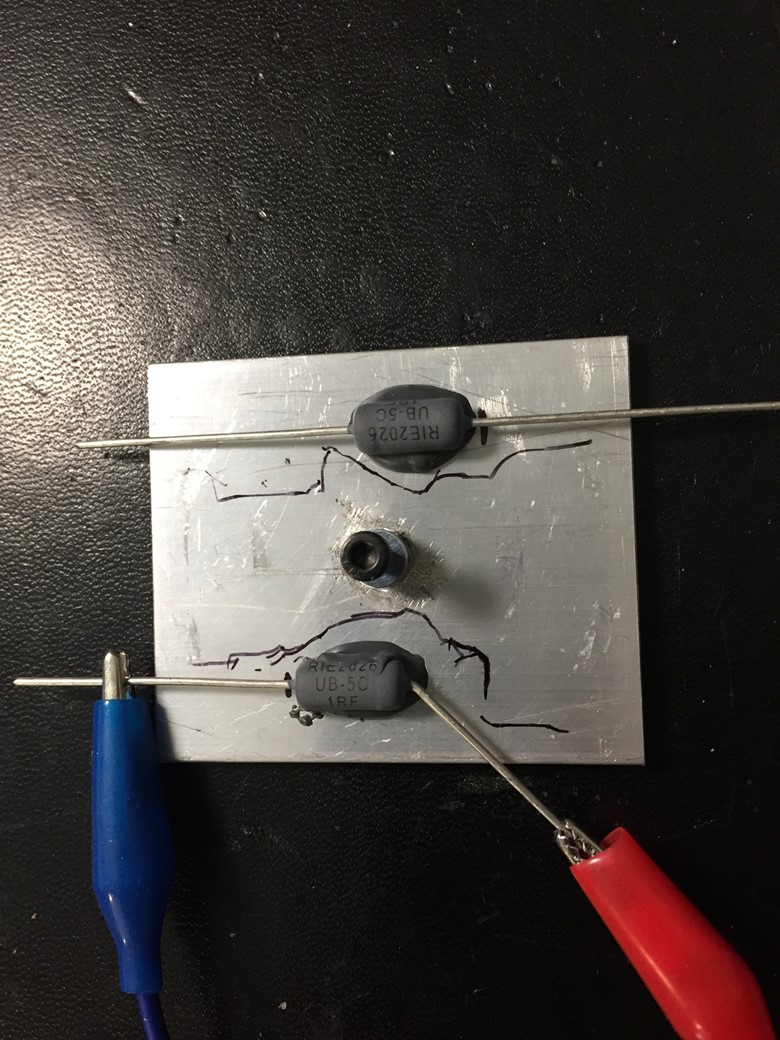
The examples I found online of printers built at this scale didn’t use a heated beds but rather focused on limiting the materials printed to those that would allow unheated beds like PLA. I thought it would be interesting to include bed heating to potentially allow using more varied material. A small scrap of 50mm x 50mm 1/8″ thick aluminium was used as the bed. 2 1 ohm 7W wire wound resistors were attached to the bottom of the bed with high temperature JB Weld.
The resistors were connected in series and some tests run to see if the bed could be effectively heated with this arrangement. The tests were positive and this bed was attached to one of the DVD mechanisms in place of the laser head.
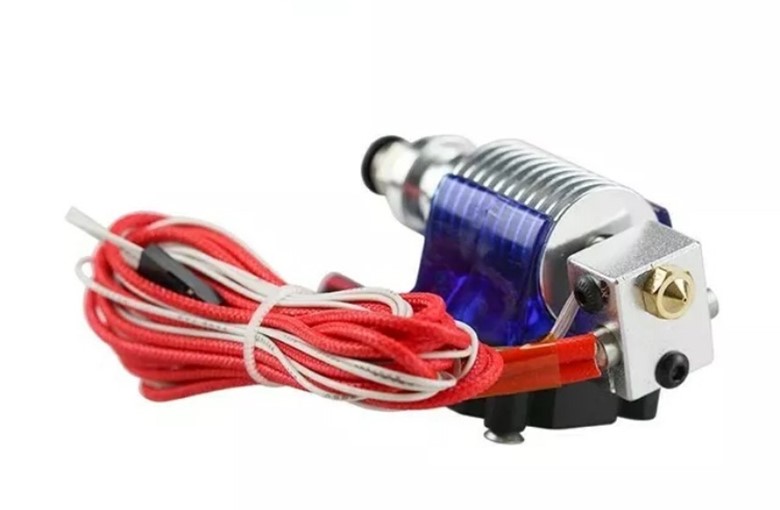
When looking at options for the hotend, it became clear that building a hotend from scratch, although fun (perhaps another blog post in the future) would probably not be within the spirit of keeping the over build time within realistic limits. As it turns out, eBay provides a large number of relatively cheap hotends with the necessary heater elements, temperature sensor, nozzle, cooling fans etc ready to go. I was able to purchase an E3D style hotend for under $10 shipped. I decide to go with this approach for now and leave the option to build my own for the future challenge.
Bowden Tubes and Extruders
Because of the very small motors that make up the DVD mechanisms I estimated that they simply would not be able to carry the weight of a direct drive extruder so it was an easy decision to look at a remote extruder with a Bowden tube to guide the filament to the head. This also factored into the selection of the e3d hotend.
Having manually pushed filament into a hot extruder it was clear that more power would be needed from a motor than was available in a DVD drive.
The standard for the consumer class extruders is to use a nema17 standard motor of around the 1-2 amp phase current. Back before we had CDROMs there were 5-1/4″ floppy disk drives and they often used nema17 stepper motors to move the heads. It may be showing my age, but I did harvest a few of these motors before disposing of them. Unfortunately, they are of the unipolar variety rather than bipolar which most common current stepper driver electronics are set up to work with. It turns out these motors can be purchased on eBay for less than $10. As fortune would have it, an eBay seller known to the Makerspace has an online store and provide a number of parts with no shipping overhead. This included the aluminum extruder itself. All up the extruder, motor and pfte Bowden tube came it at ???
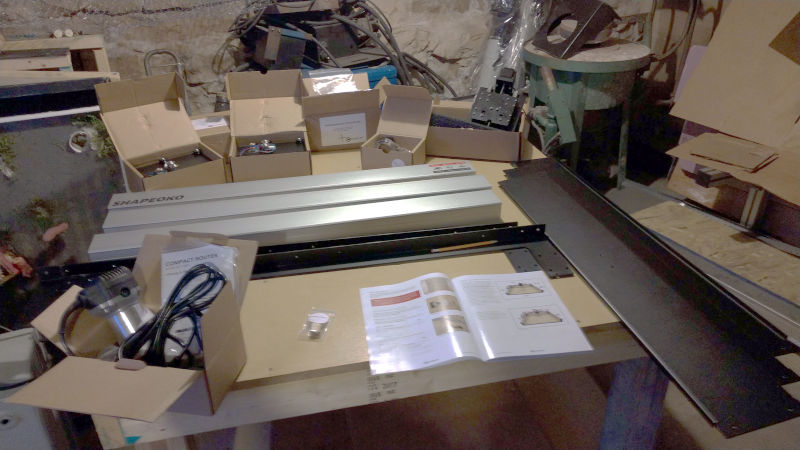
Parts that we received to build our latest CNC addition.
With the Covid-19 virus slowing down our activities, we’ve used the time to make some additions and upgrades at Castlemakers. Plus catch up with some of the work it takes to keep an all volunteer, non-profit makerspace running.
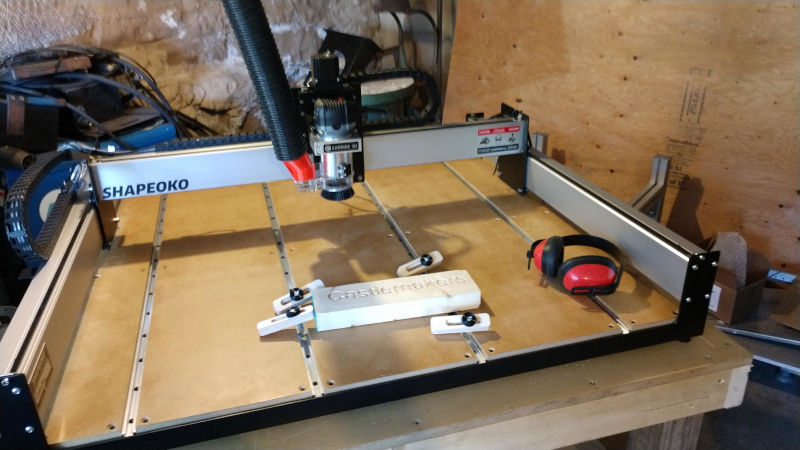
One of the more exciting additions has been a larger Computer Numerical Control (CNC) machine, a Shapeoko XXL. CNC’s have been used in manufacturing for years to make things in factories. More recently, like 3D Printing, the design, control, and cost of CNC machines has gotten to the point where desktop units are feasible. Although our latest addition is awfully big for a desktop with a 3.5×4’ (1×1.2 m) footprint!
Assembled CNC after cutting first test part with v-groove end mill. Red dust hose adapter was 3D printed at Castlemakers.
Prepping the room downstairs has taken some time, including improving electrical, airflow/dust control, and creating a big sturdy table to hold the unit when cutting/machining things. After cutting our first piece on it, the potential is very exciting. Most folks will use it for wood and plastic materials, but the rigidity, precision, and end mill rotating speeds makes metal possible. There’s already at least one member who’s planning to make guitar bodies our new one. And of course we’ll be offering community classes once we can start those again.
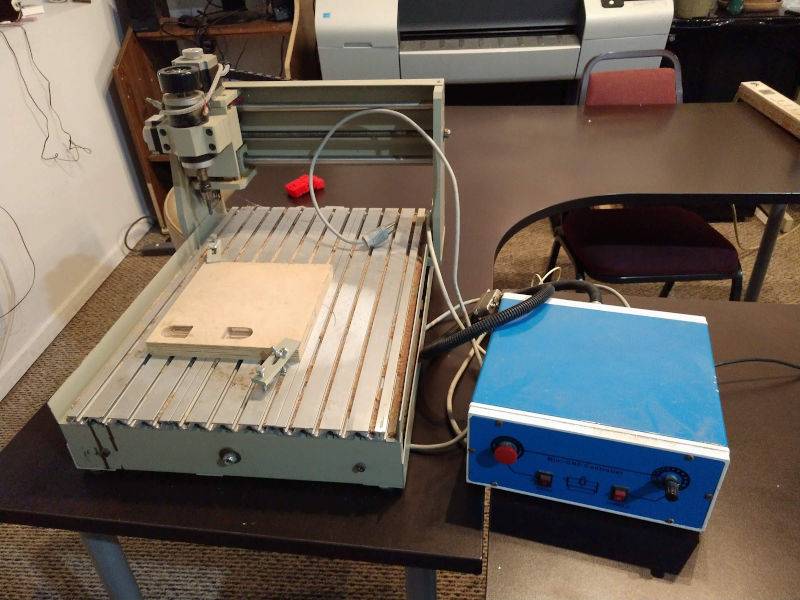
CNC table and controller that was given to the Makerspace.
We’re given a lot of different things at Castlemakers, from old scrap electronics to tools, often so they don’t go to waste or for kids to tear down and learn… and maybe a few adults. Sometimes we can even retrofit the parts into something more current.
The mini-CNC now uses an Arduino/GRBL based USB to parallel port interface so it can use standard G-code.
In March, Sam Williams of Cloverdale, who had brought his son to our CoderDojo, dropped off a box of parts that included a no-name, imported desktop CNC that hadn’t been run in several years. Where he works, a Terre Haute CNC shop, several folks had bought a few to learn CNCing. He no longer used his so gave it to us for parts or to use. It was an older model that used a parallel printer port and special control box on a Windows XP machine he also gave us.
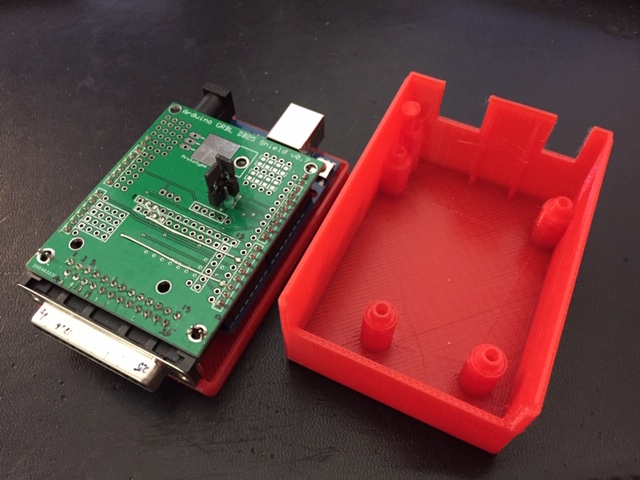
Arduino GRBL shield with 3D printed case Ian designed. Captive reset pushbutton is at the upper left corner.
One of our members, Ian, decided to get it running. By using an Arduino and a $15 controller shield, he’s been able to get it machining using a laptop and free open source software via a USB port – a big improvement! He even designed and 3D printed a case which has a print-in-place button to press the onboard reset button.
You can see it if you look at the table through our front window; adding limit switches is the next addition. After that we’ll put it in the front window on Franklin St. for a while before using it in classes, it’s a pretty good machine to learn about CNC’s.