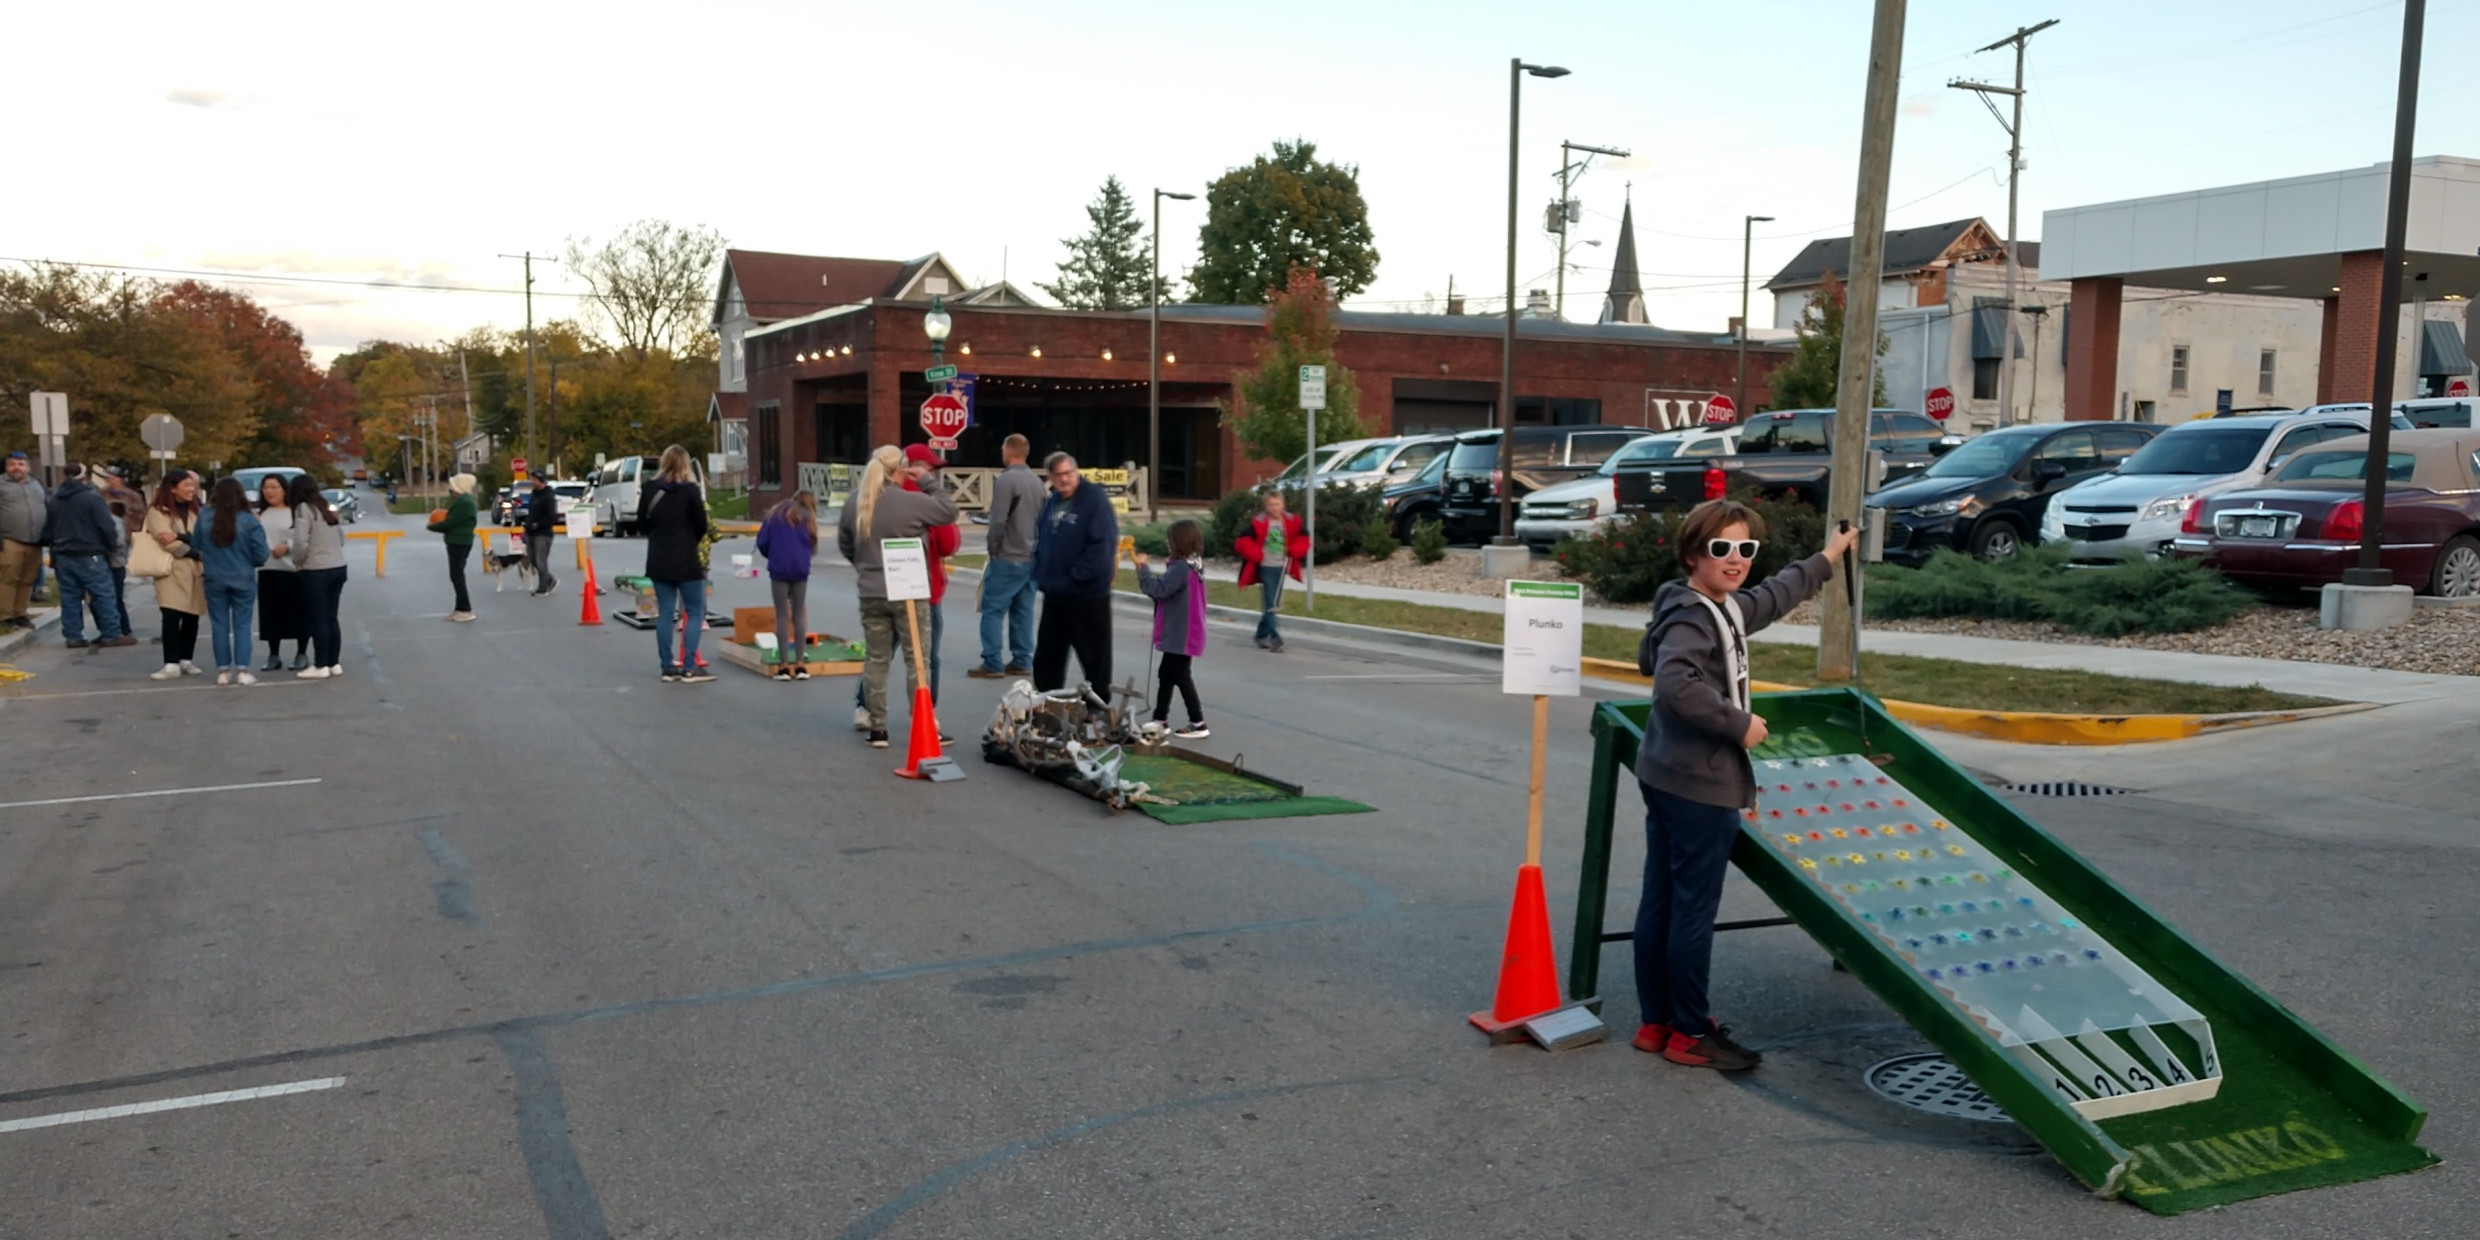
Temperatures in the 40’s meant the 2022 Putt Putnam County was literally our ‘coolest’ one yet!
This month started off with our 6th annual Putt Putnam County event, which is always exciting not only for those building a mini-golf hole but also the crowd played course down Franklin Street. This year was much colder than usual, but still fun for those that made it out to play the community built 12 hole course this year. We’ll be looking to increase the number next year, so start working on ideas now!
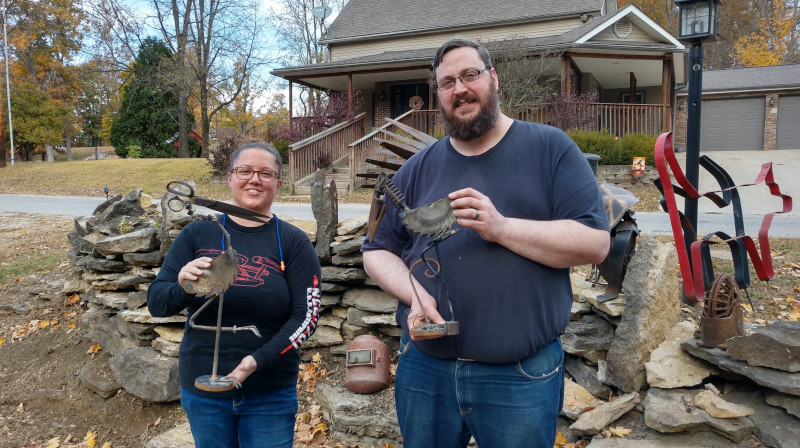
Becky and Chuck show off the yard birds they made in our Intro to Welding class.
We’ve also had several classes this month, including offering our first welding class where people could learn how to weld by making a yard bird! Troy Fiechter, one of our members & a talented artist/welder on his own, taught the basics of welding in the half-day class and then helped them to make their own yard art using a wide variety of different scrap parts and tools.
Our Tinkercad/3D Printing class was a good turnout and nice mix, combining interested locals and people that drove up from Linton, Indiana. Not the farthest someone’s driven to take one of our classes (Kokomo still holds that record), but nice to know that others appreciate our offerings. October also means we get to help out with Putnam County Public Library‘s Halloween Event, which we bring out one of our 3D printers to make bats, skulls, and other scary objects to give away to the kids that come there.
We’ve got a number of classes planned for November, including a Raspberry Pi configuration class this Wednesday and Learning to Solder class later in the month. Check out our learning / classes webpage for those & more.
This coming Wednesday, August 3rd, from 7-8:30 pm we’ll be putting on a solar system information session at Castlemakers. This no-charge presentation will briefly discuss general types of solar systems used in homes, then dive deeper into photovoltaic systems and solar panels. If there’s time, we’ll also talk briefly about how to determine solar potential at your location. If you’d like to read more, here’s a blog post that covers a session we did before.
We’ve started the new year by offering a CNC class and planning an exciting year of learning opportunities to help people with making & DIY skills. Next week on Jan 26th we’ll be doing a workshop on doing a Solar Assessment using PVWatts, part of the grant we received last year to create a solar awning and become an area resource for solar/photovoltaic energy. And watch for a more advanced CNC class that will focus on techniques that can be used to create signs and other objects out of wood, acrylic, and maybe with some patience even metal.
But we’re especially interested in what you’d like to learn about. Our classes are for and taught by people in the community. We’ll have a Fusion 360 (a design program) class in February and are planning to offer the Jelly Art class again this summer. But tell us what you’re interested in by email (classes-at-castlemakers.org) or stop by the makerspace sometime and let us know. If you have an interest in teaching something to others in the community, also let us know – we’d be glad to see if we can help offer it through Castlemakers!
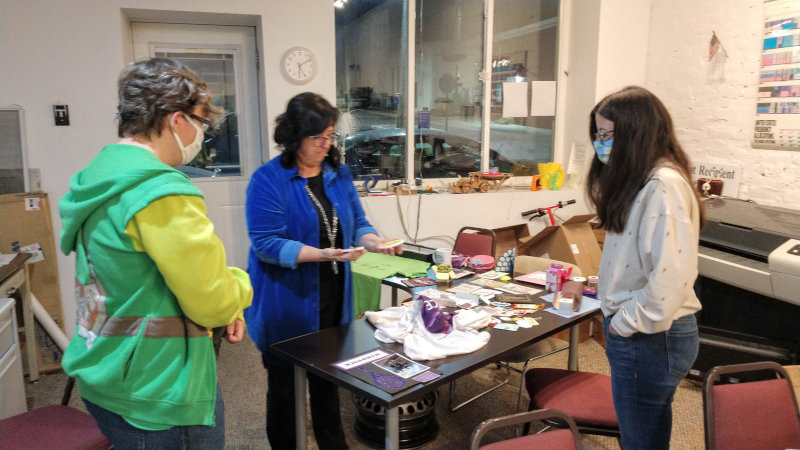
It was great to be able to offer a Cricut/ electronic cutter class again before the upcoming holidays. We offered the class several years ago, actually before we had the current Cricut Maker at the makerspace.
Laurie showing some of the things that can be made with an electronic cutter.
The class covered the basics by making several gift bags and a holiday greeting card, although the makerspace machine can be used for lighter and heavier materials including fabric and even balsa wood. Laurie Hardwick, who has a history of creating all kinds of things with a Cricut, taught the class and did a phenomenal job – the things she brought in to show everyone were amazing.
If there’s interest, we can do another Cricut class after the first of the year. If you’d like to make more holiday items, be sure to check out our classes webpage for an upcoming lasercutter class where you can learn to make a holiday ornament.
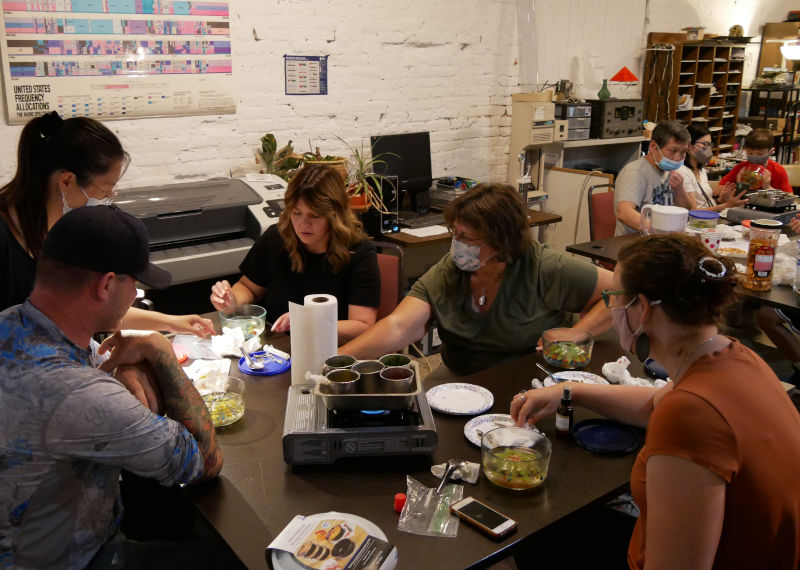
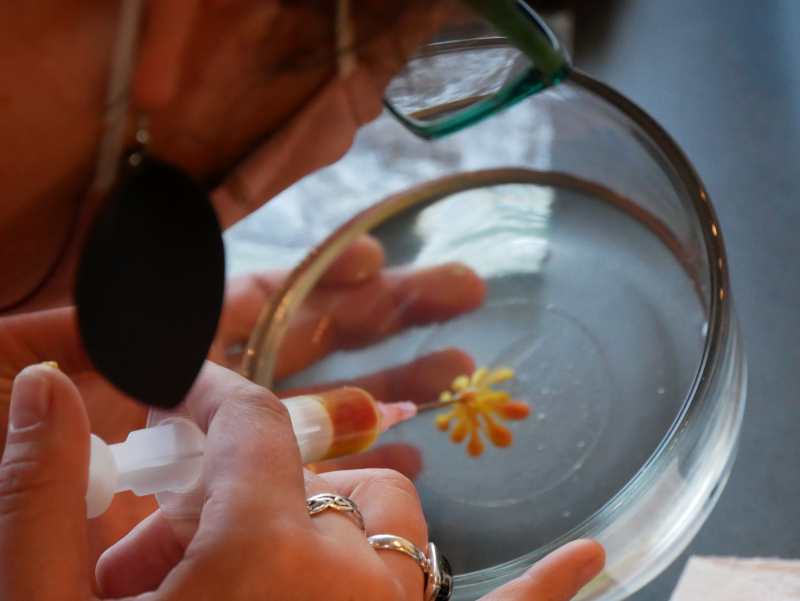
This last week we offered something completely different – a class on making edible flowers in gelatin. “Jelly Art” is a popular technique in Asia using a syringe to inject natural ingredient colors into a clear gelatin base. With the proper needles and some patience, participants made some pretty amazing decorative gelatin art that they could take home to eat if they wanted.
Flower petals & leaves are made with natural ingredients that are injected into the special gelatin.
For all of us that had never done this before, it was surprisingly easy, although having someone demonstrate how to do it (and help if a mistake was made) was perhaps the most valuable part of the class. If you’re interested in the materials used, we’ve got a webpage for the class that explains the materials used in making the gorgeous flowers.
Special thanks to Weiwei for teaching the class & bringing all the materials to get it done in a 3 hour class. Should we offer another class like this in the future? Let us know!
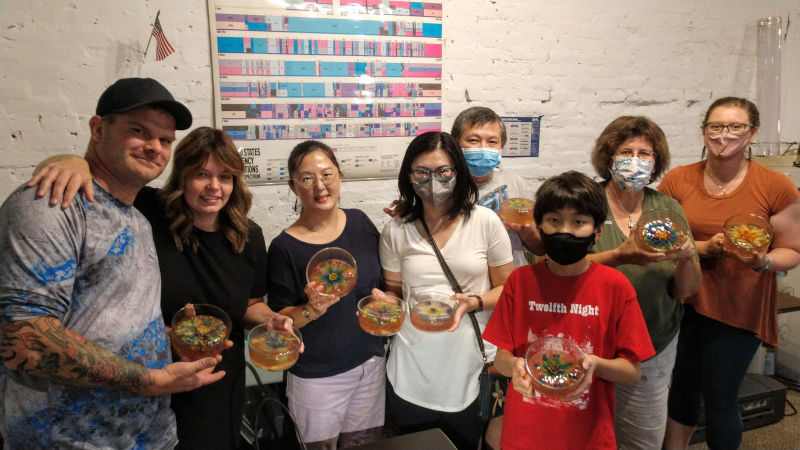
Everyone showing their completed edible flowers that they made in the class.
Example flowers made in clear gelatin by students.
Castlemakers offered a Jelly Art class, taught by Weiwei Chao, in the fall of 2021 at the makerspace. If you’re interested in learning how to make edible gelatin flowers, we’ll be having another in the summer of 2022 when she’s back from Taiwan.
Jelly Art (sometimes called Gelatin Art) is made from a high quality gelatin with a few extra ingredients. Edible and colored liquids are injected in a clear gelatin base to create an artistic design, often flowers and leaves, to create an extremely impressive edible dessert. It is currently very popular to make these in Asia.
For the class Ms. Chao helped participants with the process of making one of these beautiful creations so that everyone got to take a flower they made home. The $40 cost for the 3 hour class included everything needed to make your own design. A list of ingredients are below.
Ingredients: Taiwanese made Konjac Jelly (Japanese vegetable jelly), Coconut cream, sugar, water, Butterfly pea flower powder, turmeric powder, purple sweet potato powder, Red yeast from rice, strawberry powder, green tea powder (Matcha).
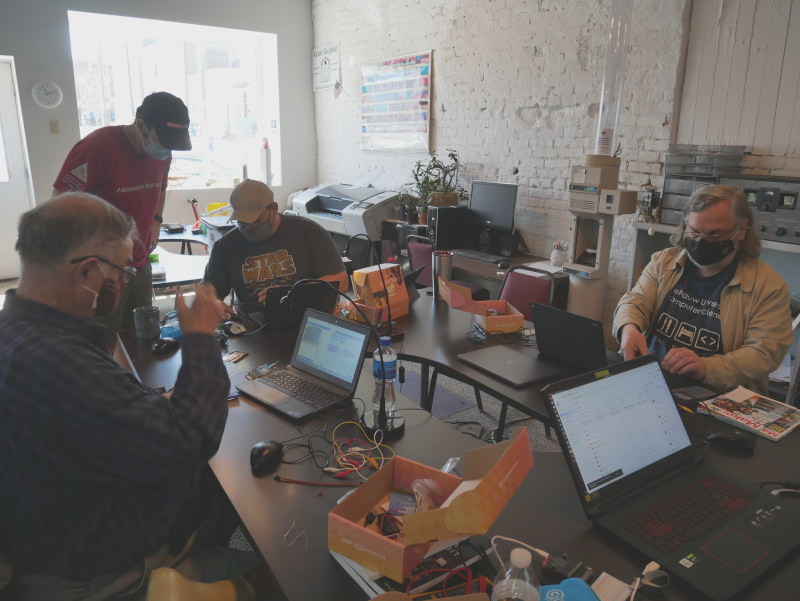
Our 5/1 class on learning about micro:bit interfacing.
Last weekend we had our advanced micro:bit class that was cancelled last year due to Covid. Ian Girvan, one of our members, taught the class & everyone there learned a thing or two about the more advanced features of this IoT like device. The class was taught using v1.6 of the micro:bit, v2’s released last November are still almost impossible to find; versions are similar enough it doesn’t make a real difference.
Participants learned how to use a breakout board to connect lights, sound, & control a DC motor with a micro:bit. They even got the chance to use a light sensor & variable resistor as input to control a LED.
Our next class, coming up on May 29th, will be a ‘learning to solder’ class where folks make a little jitterbug robot that starts moving when the light sensor detects darkness. We’ll soon be adding a lot more light/solar projects and classes with some upcoming makerspace additions in the next few months.
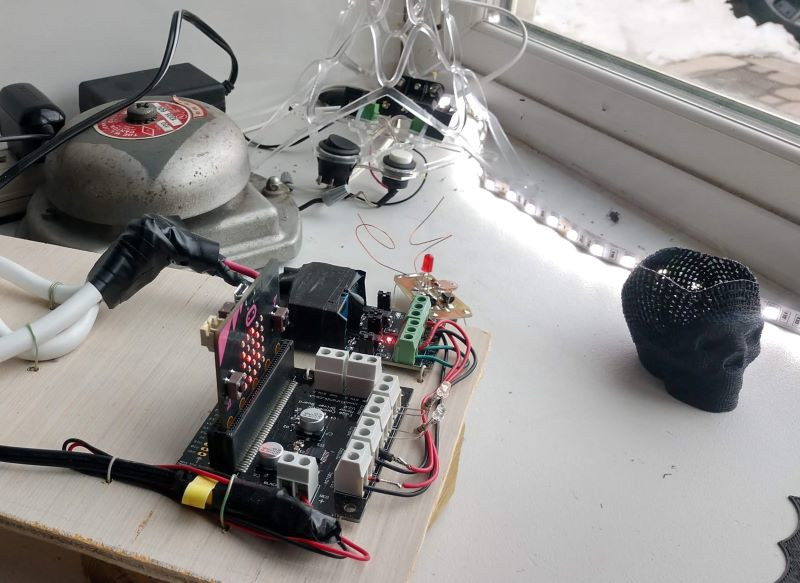
micro:bit with a relay controlling an alarm bell & LEDs.
Now we’re able to have classes at the Makerspace again, last Saturday there was a free ‘Intro to micro:bit’ class for anyone interested. It went well, with several attendees liking it so much they signed up on the spot for our next micro:bit class which will cover the device in even more detail.
This coming Saturday, May1st at 1 pm, we’ll cover using external devices with a micro:bit, including hooking up light strings, switches, and even a motor to the single board computer given to all 6th graders in Putnam County. This will be an all ages class however, the simple and powerful IoT like device can be programmed by anyone from 8 to 80. We’ll have everything you need for the hands-on class where you’ll learn to control a string of neopixel lights and no previous experience is needed. Learn more about it on our classes webpage.
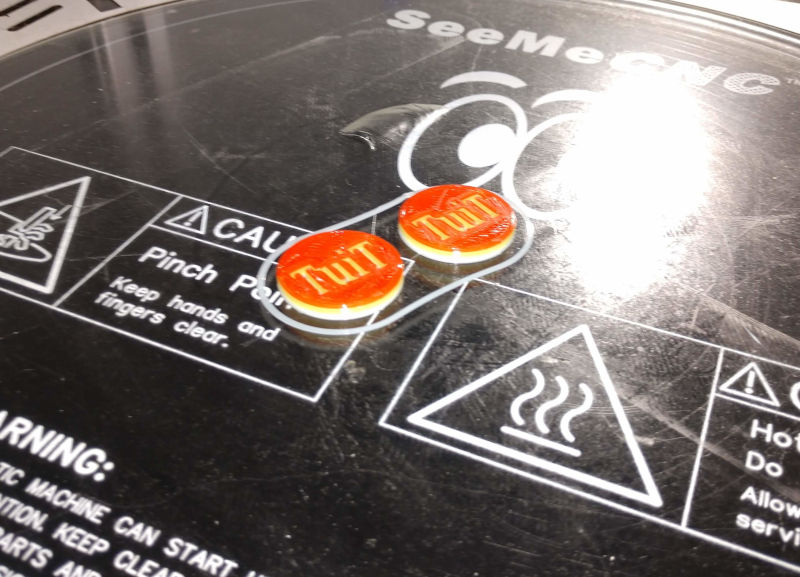
Multi-color Round Tuits designed in January 3D printing by class attendee David.
It’s exciting to be able to offer classes again, even though with a reduced size and constraints due to Covid. Introduction to 3D Printing will be offered on January 23rd at 1 pm and our popular Introduction to Laser Cutting/Engraving on February 20th. We’re hoping there’s also interest in some micro:bit classes, refer to our classes page for more information.
We’ve continued to experiment, a lot, with the micro:bit since giving them away to youth in the fall of 2019. The micro:bit capability is still impressive for a device that size. In the window of our Franklin Street location you can see several micro:bit projects, including some that have been written about before.
Window micro:bit that remotely flashes lights & rings an alarm bell!
One of the more mysterious window projects uses the micro:bit’s internal bluetooth radio. There’s been a micro:bit for some time that sends scrolling text and can control a string of lights and a rather loud alarm bell if the right text is sent wirelessly from another micro:bit to the window unit.
Hint: the words to send are obvious, it’s easy to program in MakeCode, and use Radio Set Group 1. It even works from outside! I’ll link later to some more detailed additional help.
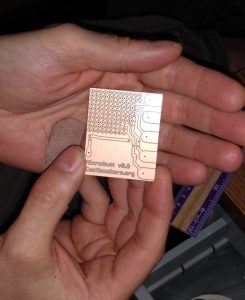
It started at our Intro to 3D Printing class – Ian who had found us through an Internet search, was interested in makerspaces & signed up for the class. Since he hadn’t seen the makerspace before, gave him a tour afterwards. When showing him our desktop CNC machine, discussed how it was possible to do a printed circuit boards (PCB) but we hadn’t yet tried it. His eyes lit up as he mentioned creating some circuit boards that were sent away to get made. It wasn’t hard to quickly come up with a project.
With a lot of micro:bit work at Castlemakers because of the Putnam County Microcomputer Initiative (PCMI) lately, creating a micro:bit accessory board seemed like a great choice. At our model rocket class in August we tried to launch a micro:bit board to measure acceleration, but the lack of a small battery & SD card prevented it.
After talking through the features wanted on a board, Ian quickly did a PCB design that became our first test of using the desktop CNC to make an electronic component circuit board. It machined great, but we also learned there had been some assumptions and spacing errors we hadn’t thought of. That’s when DIY makerspace mentality paid off – instead of waiting 10-12 days for another firm to make a new circuit board, after the design change we made the new design in less than 15 minutes! The desktop CNC is really a great tool for testing and making prototypes.