One of our members wanted to make a commemorative plaque for his church using the CNC and laser engraver at Castlemakers. I volunteered to help, thought it would be a good chance to use our bigger CNC with some newly updated software and we could both learn in the process.
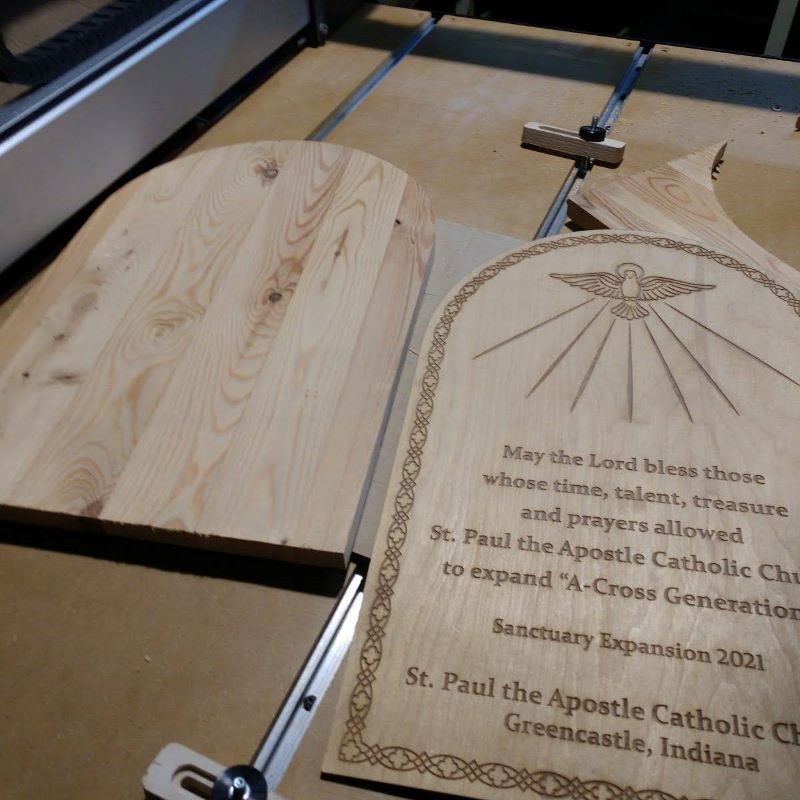
Given the nice wood they wanted to use, doing several prototypes with lower cost wood seemed in order. It also would give him something to show the church committee approving the plaque. Ed was able to locally source some rough cut black walnut wood and another member Ian used his planer so the wood could be glued to an appropriate width.
In the meantime one of the other church members created a great looking design for the engraving. For the first prototype, done in birch plywood, we just used the laser to cutting the shape to show others for approval. This resulted in a few minor changes and a decision by the group to add gilding to part of the dove and the rays on the plaque.
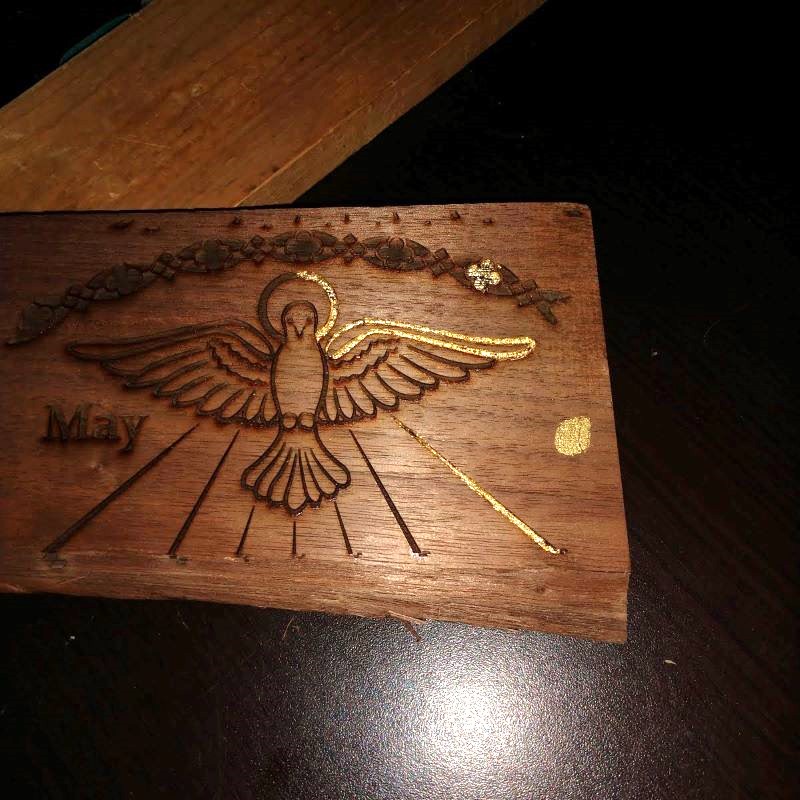
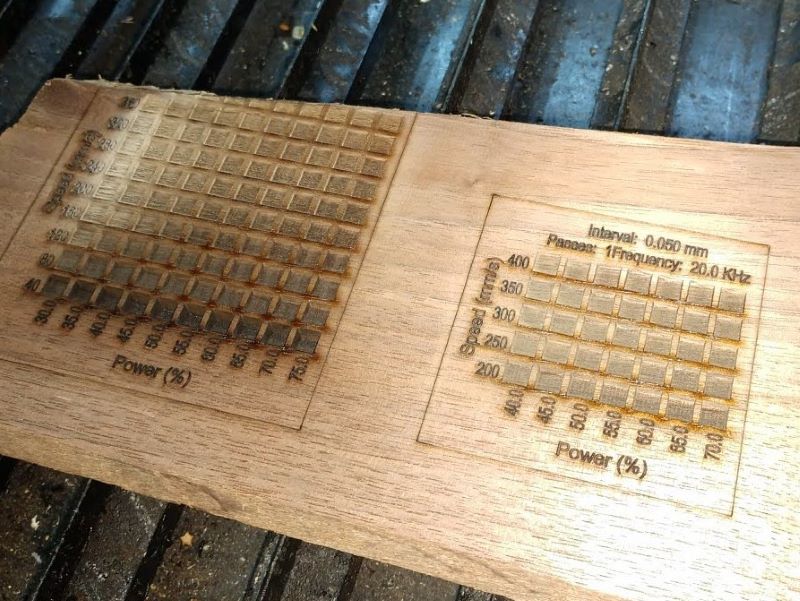
The final plaque is on darker wood, so we engraved a sample portion on some scrap black walnut and it’s a good thing we did! The original rays were too thin, making gilding extremely difficult. Now with the final design was completed, another prototype was made in pine the thickness of the final plaque to make sure the CNC portion of the project was going to work with the engraving.